
In June 2022, I received a scholarship to attend a Summer School on Japanese Carpentry organised by Domaine de Boisbuchet and Michelangelo Foundation. It was a 10 day workshop that took place on location at the Domaine and I attended it along with 11 other students from all over Europe.
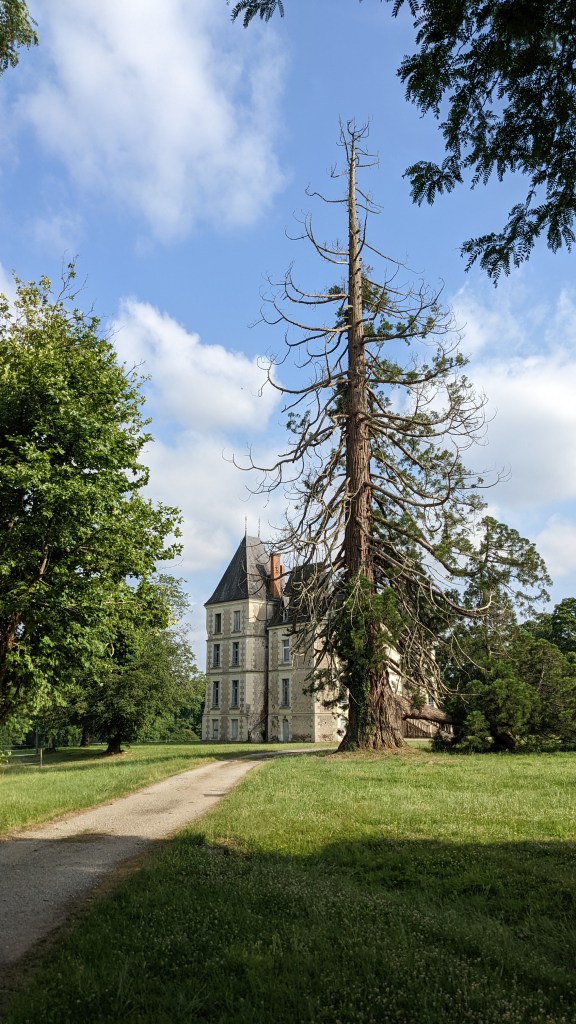
Domaine de Boisbuchet is a utopia close to Bordeaux in France where Design meets Art. It is an international centre for workshops, research, and education on sustainably innovative design and architecture. Created in 1986, it is located in the southwest of France on 150 hectares of protected nature and ecological agriculture.
The Michelangelo Foundation is an international non-profit organization based in Geneva, Switzerland, that celebrates and preserves master craftsmanship and strengthens its connection to the world of design.
I am sincerely honoured to have been given this opportunity, I learnt so much and met so many interesting people.
Read Part 2 here
Part 1 – Traditional Japanese Joinery
The first part of the course was conducted by master craftsman Takami Kawai. He runs an architecture and construction firm in Kyoto where he repairs shrines, renovates traditional wooden houses, and constructs ideal living spaces using traditional Japanese carpentry techniques.

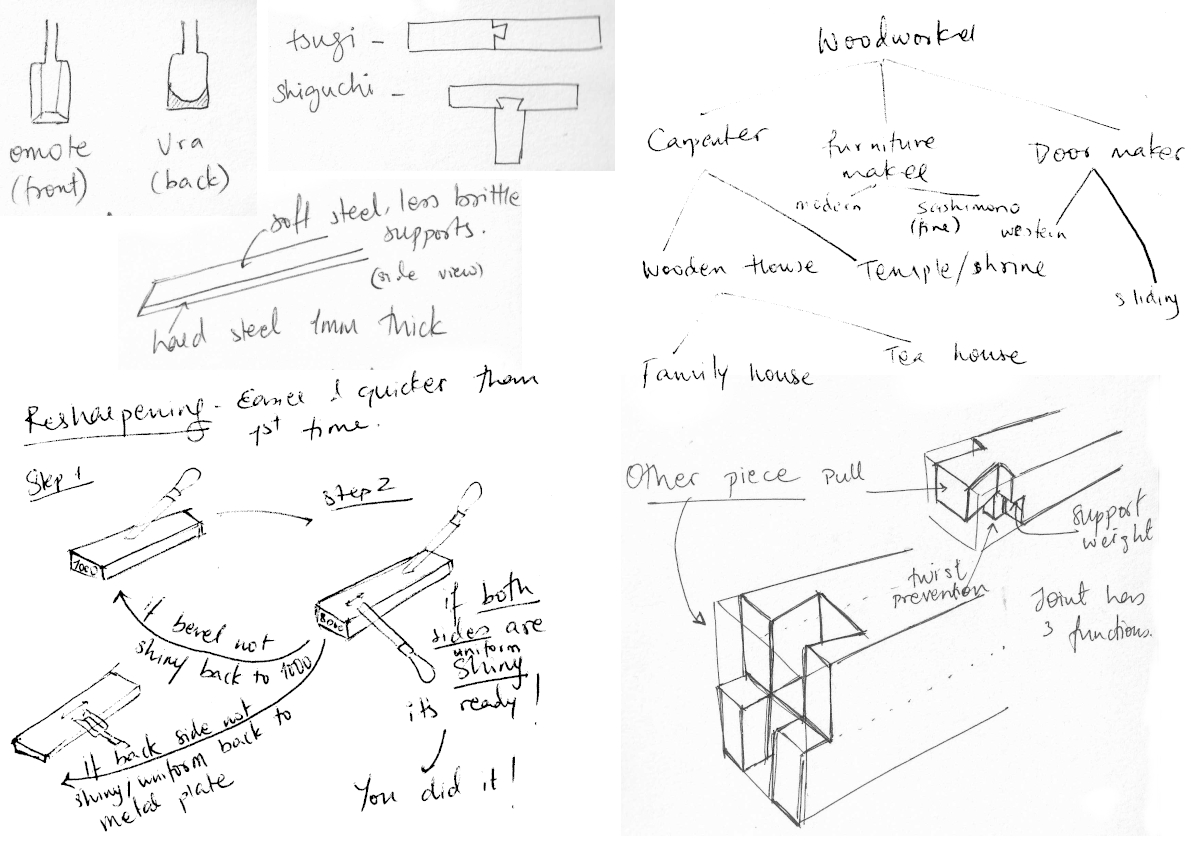
We learnt about all the different kinds of Japanese hand tools like Handplanes Kanna , Chisels Nomi , Hammers, Saws Nokogiri, and Marking equipment like Right angles Sashi gane.


Adjusting and Sharpening A Chisel
We started working on our own set of tools after learning a little about the different kinds. We were given a Nomi each, and had to first adjust the back of the handle. This means taking off the metal ring, compressing the wood at the back of the handle, putting the ring back, and folding the wood “over” the metal ring. This ensures that while striking the chisel with a hammer, one only hits wood.
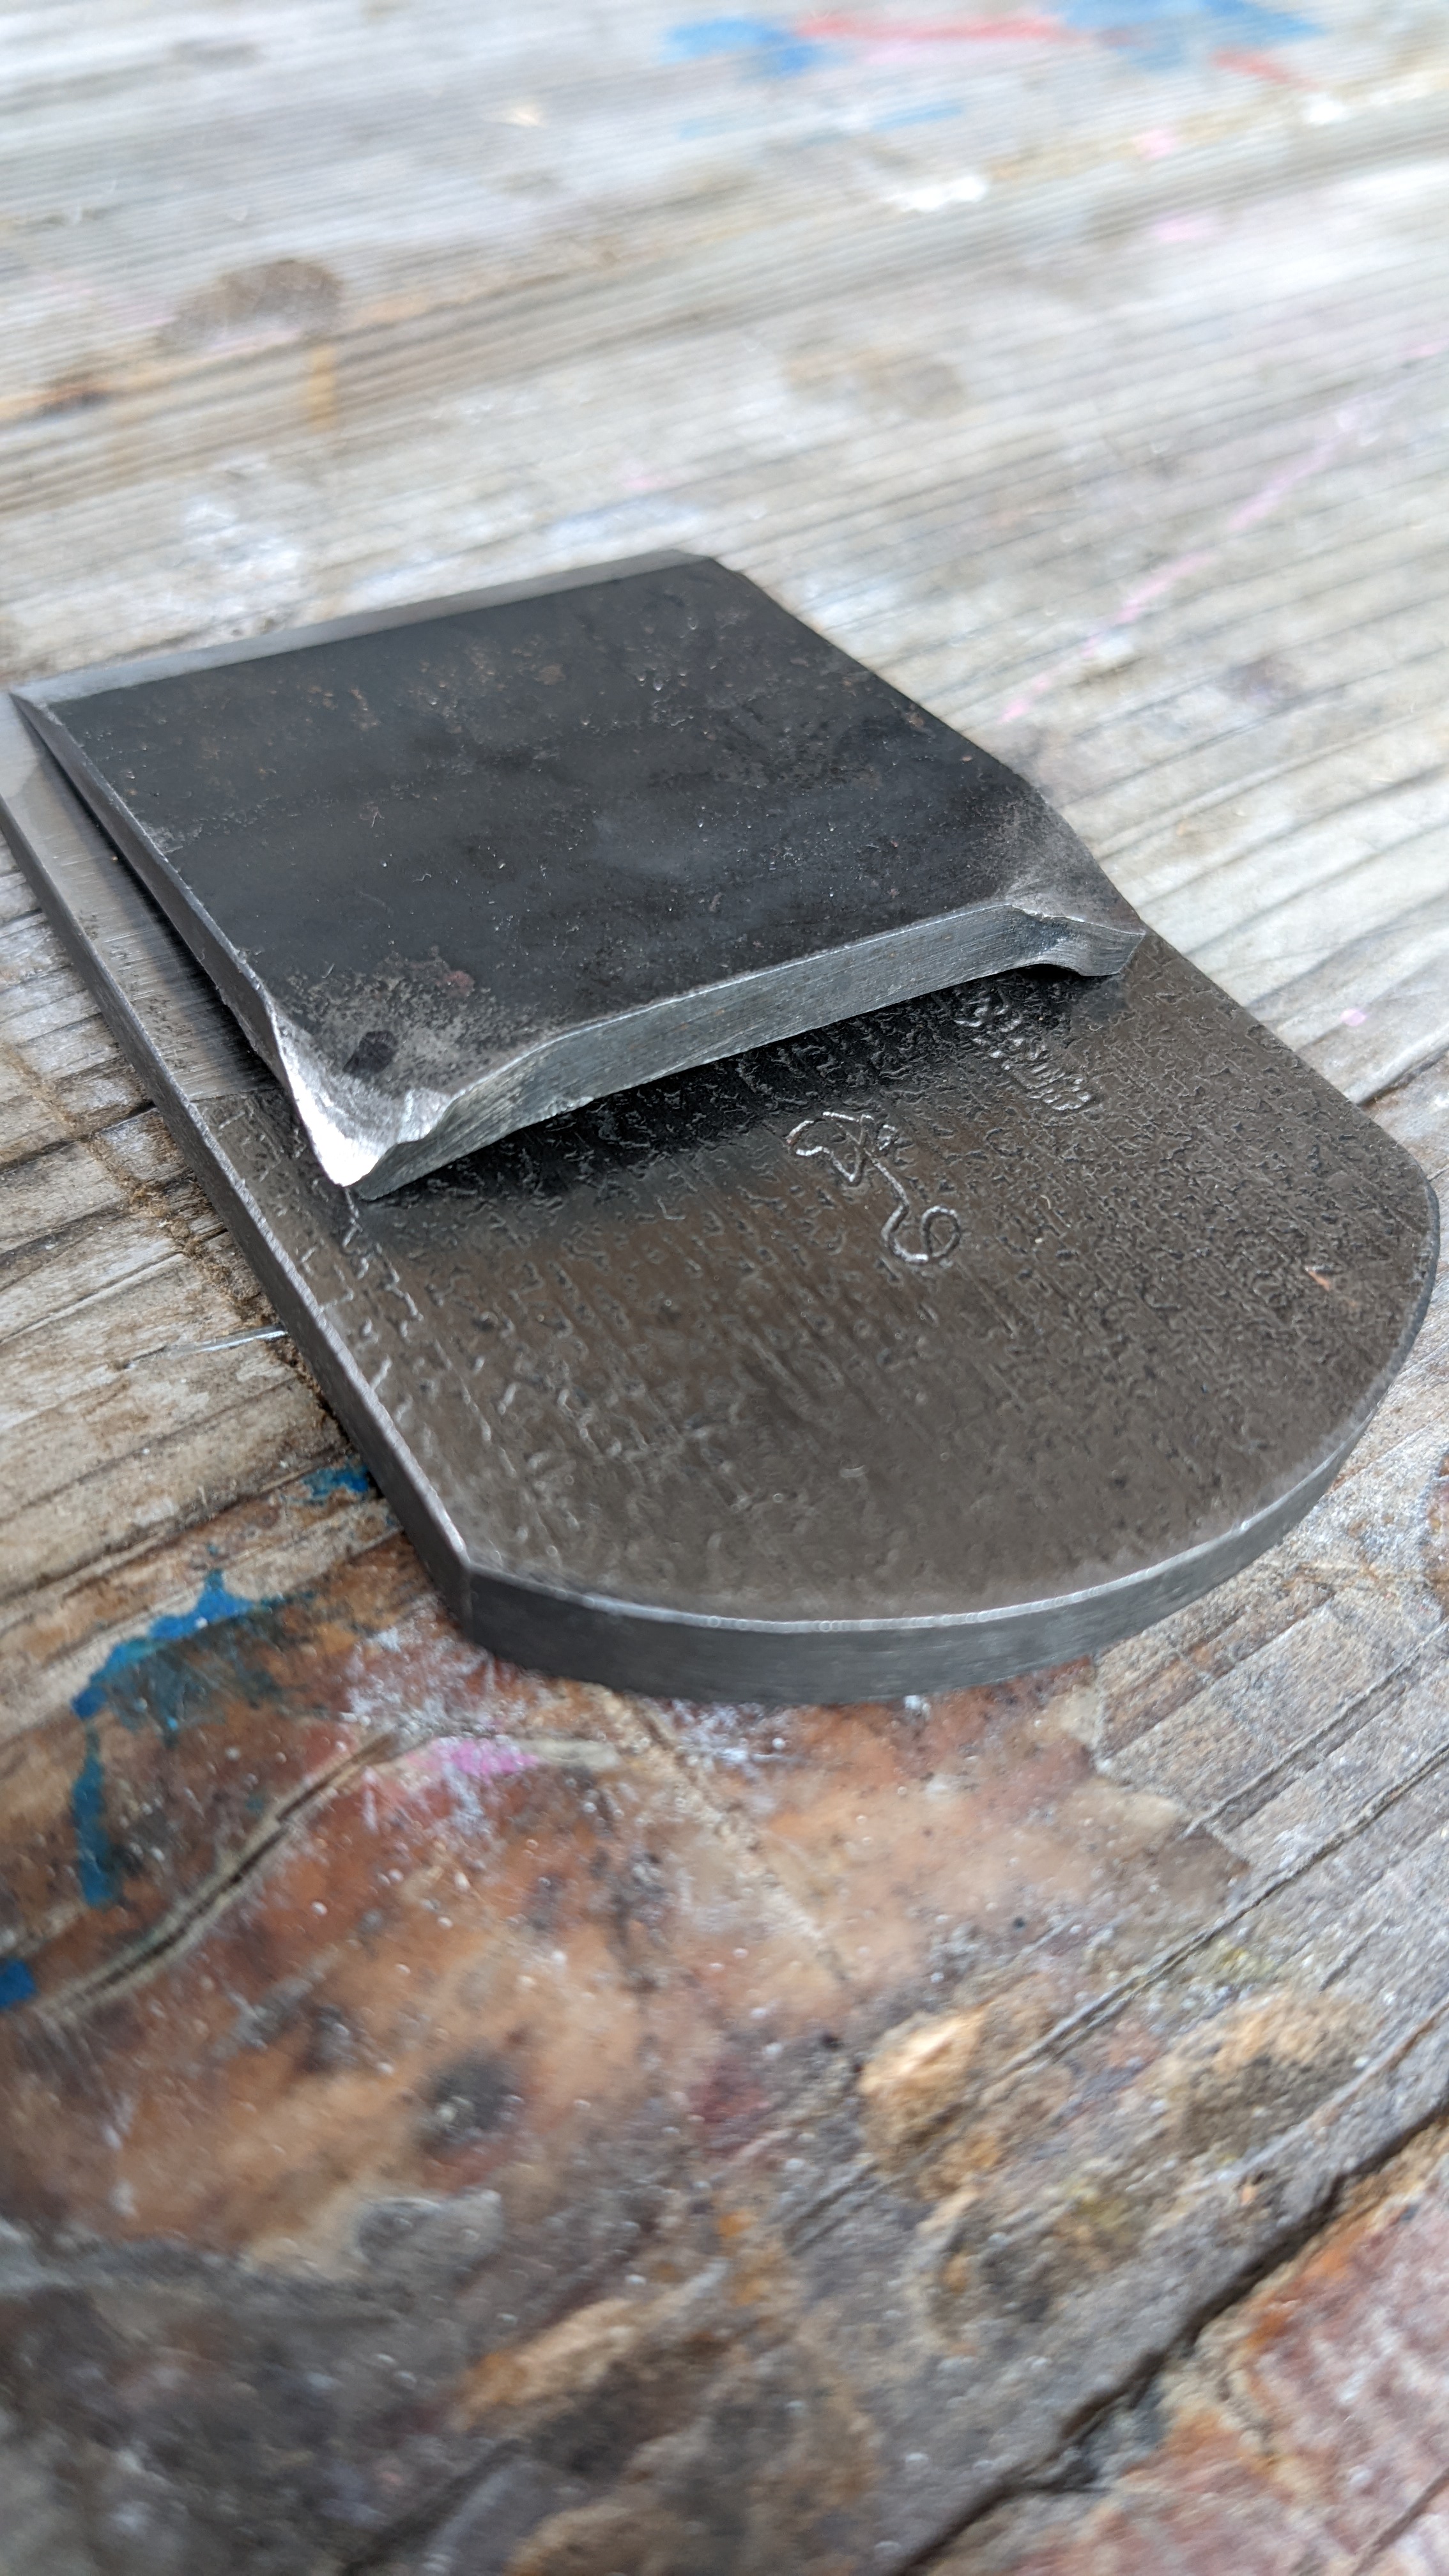
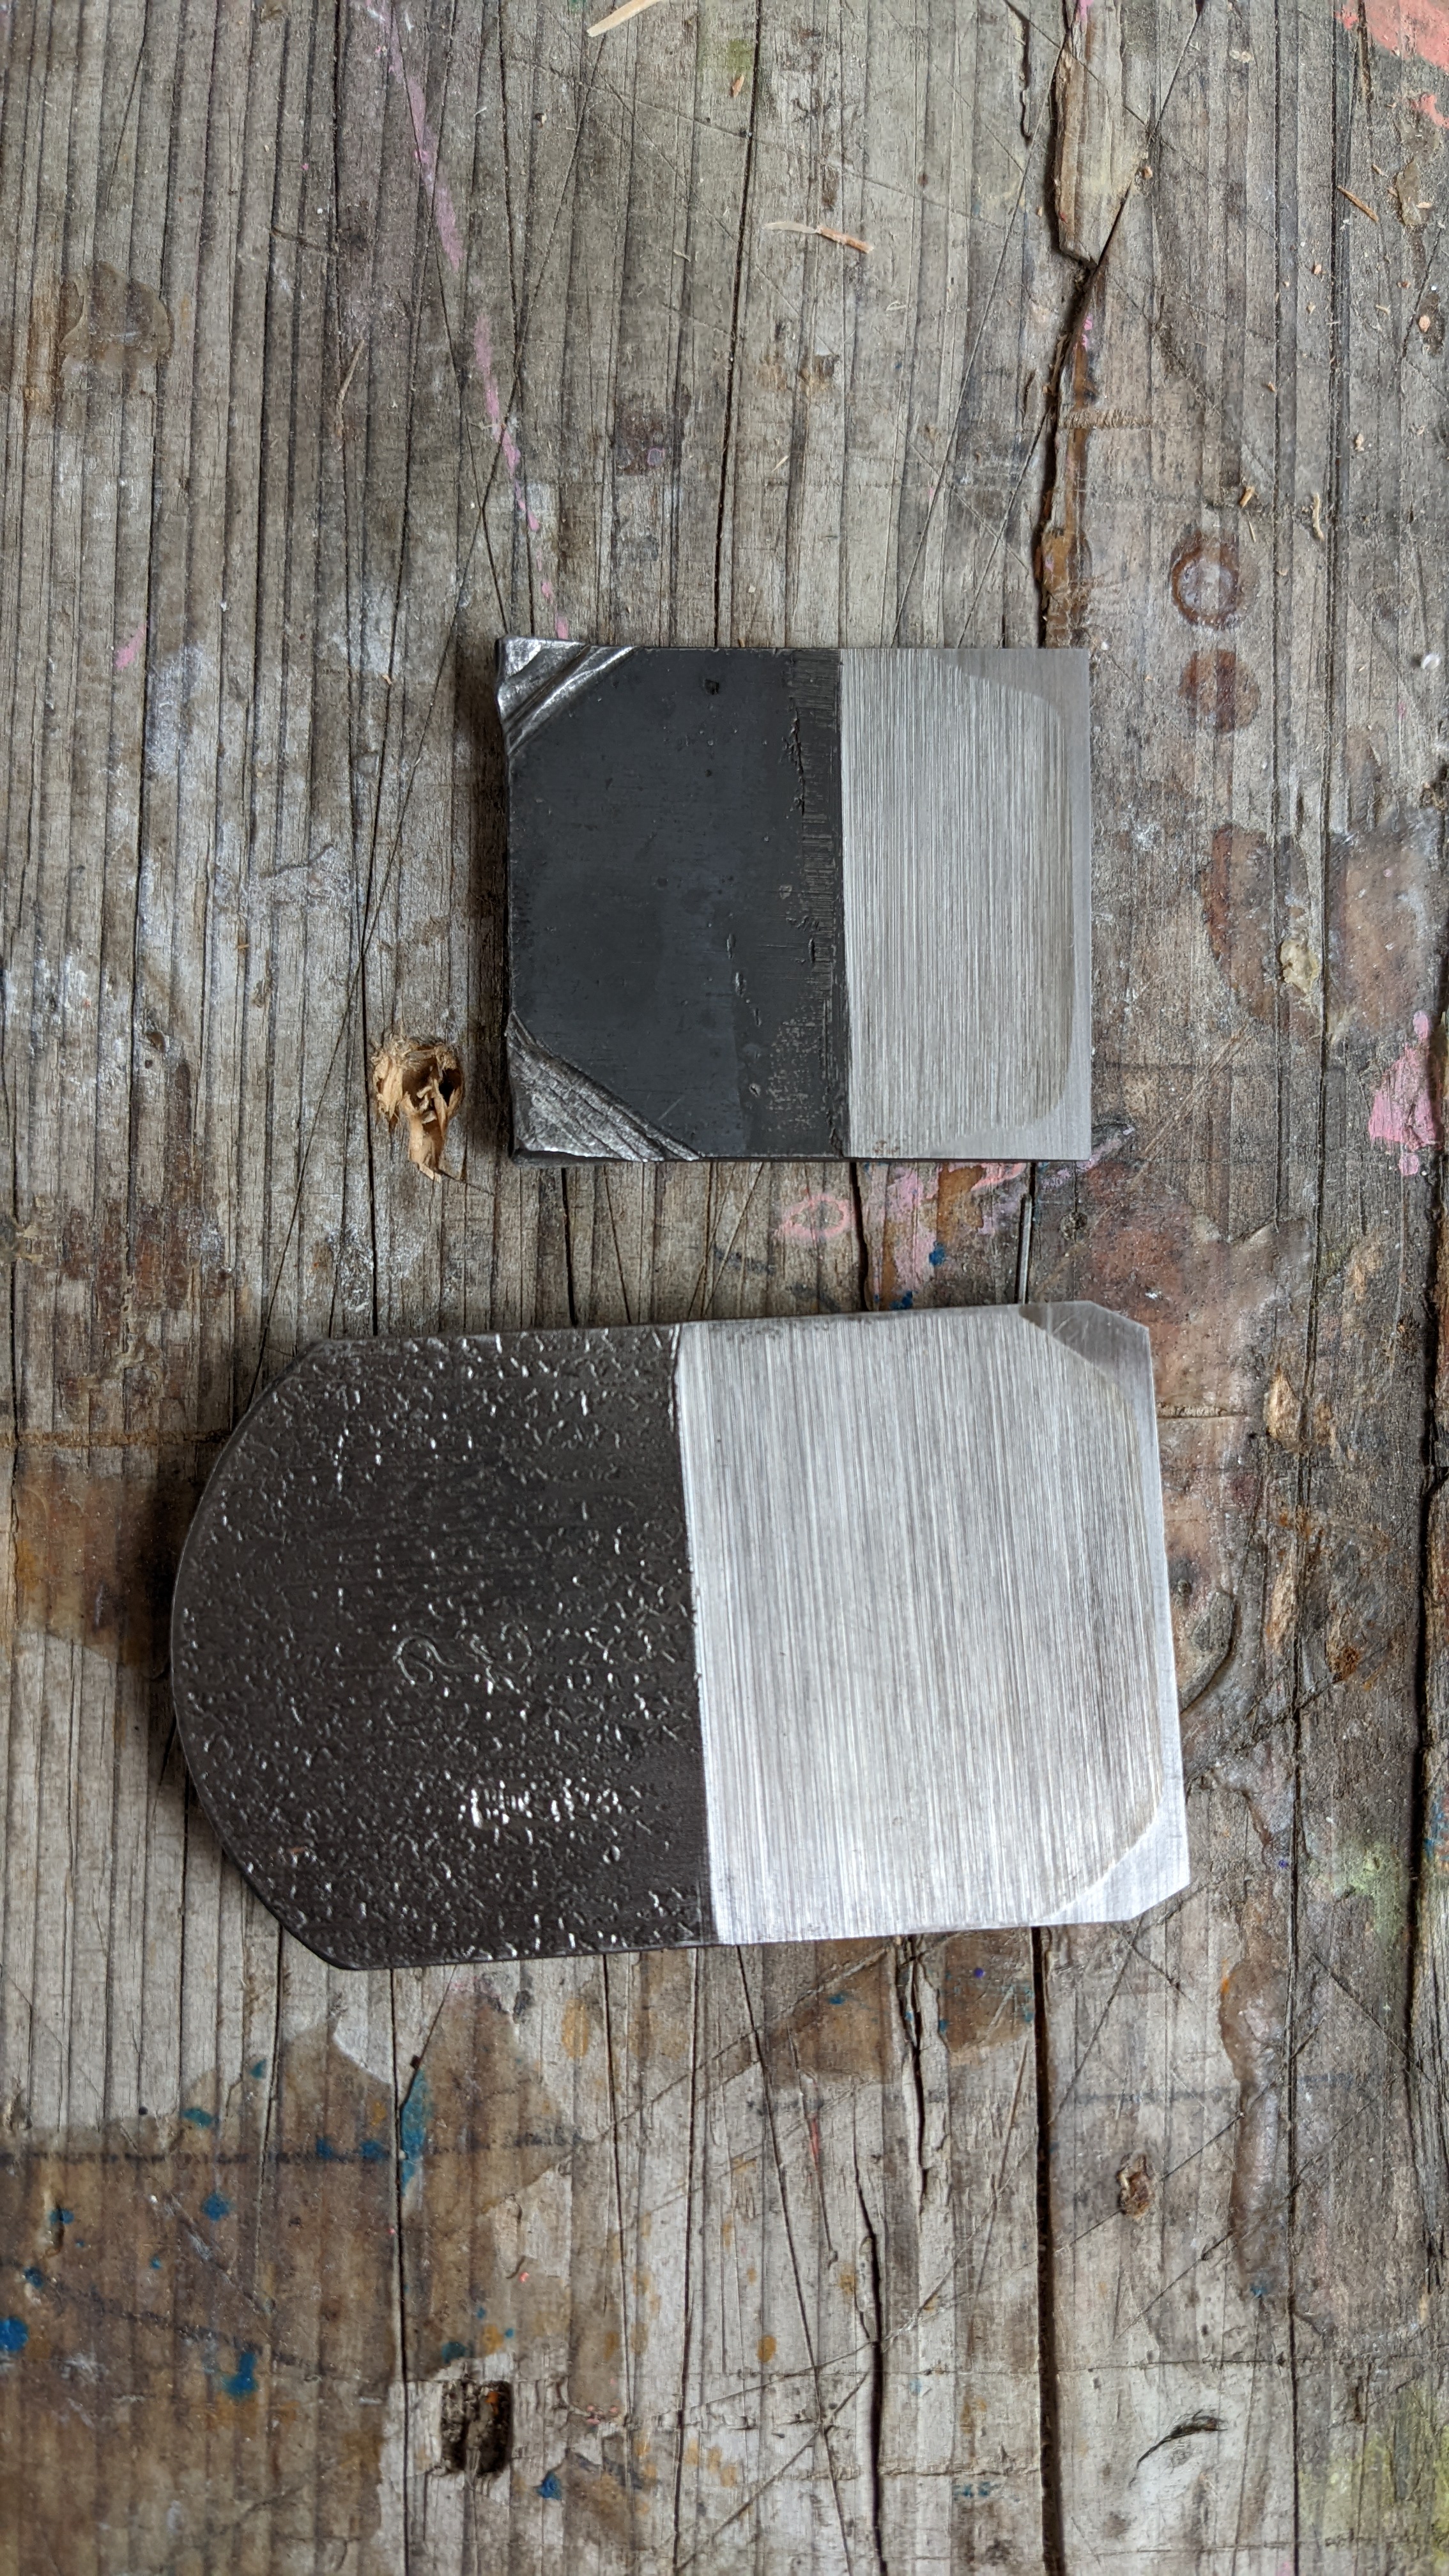
Once the handle is adjusted, the metal tip of the chisel is sharpened. This process begins by flattening the back Ura of the chisel on a metal plate. Once an even shiny surface is achieved, the bevel side of the chisel can be sharpened.
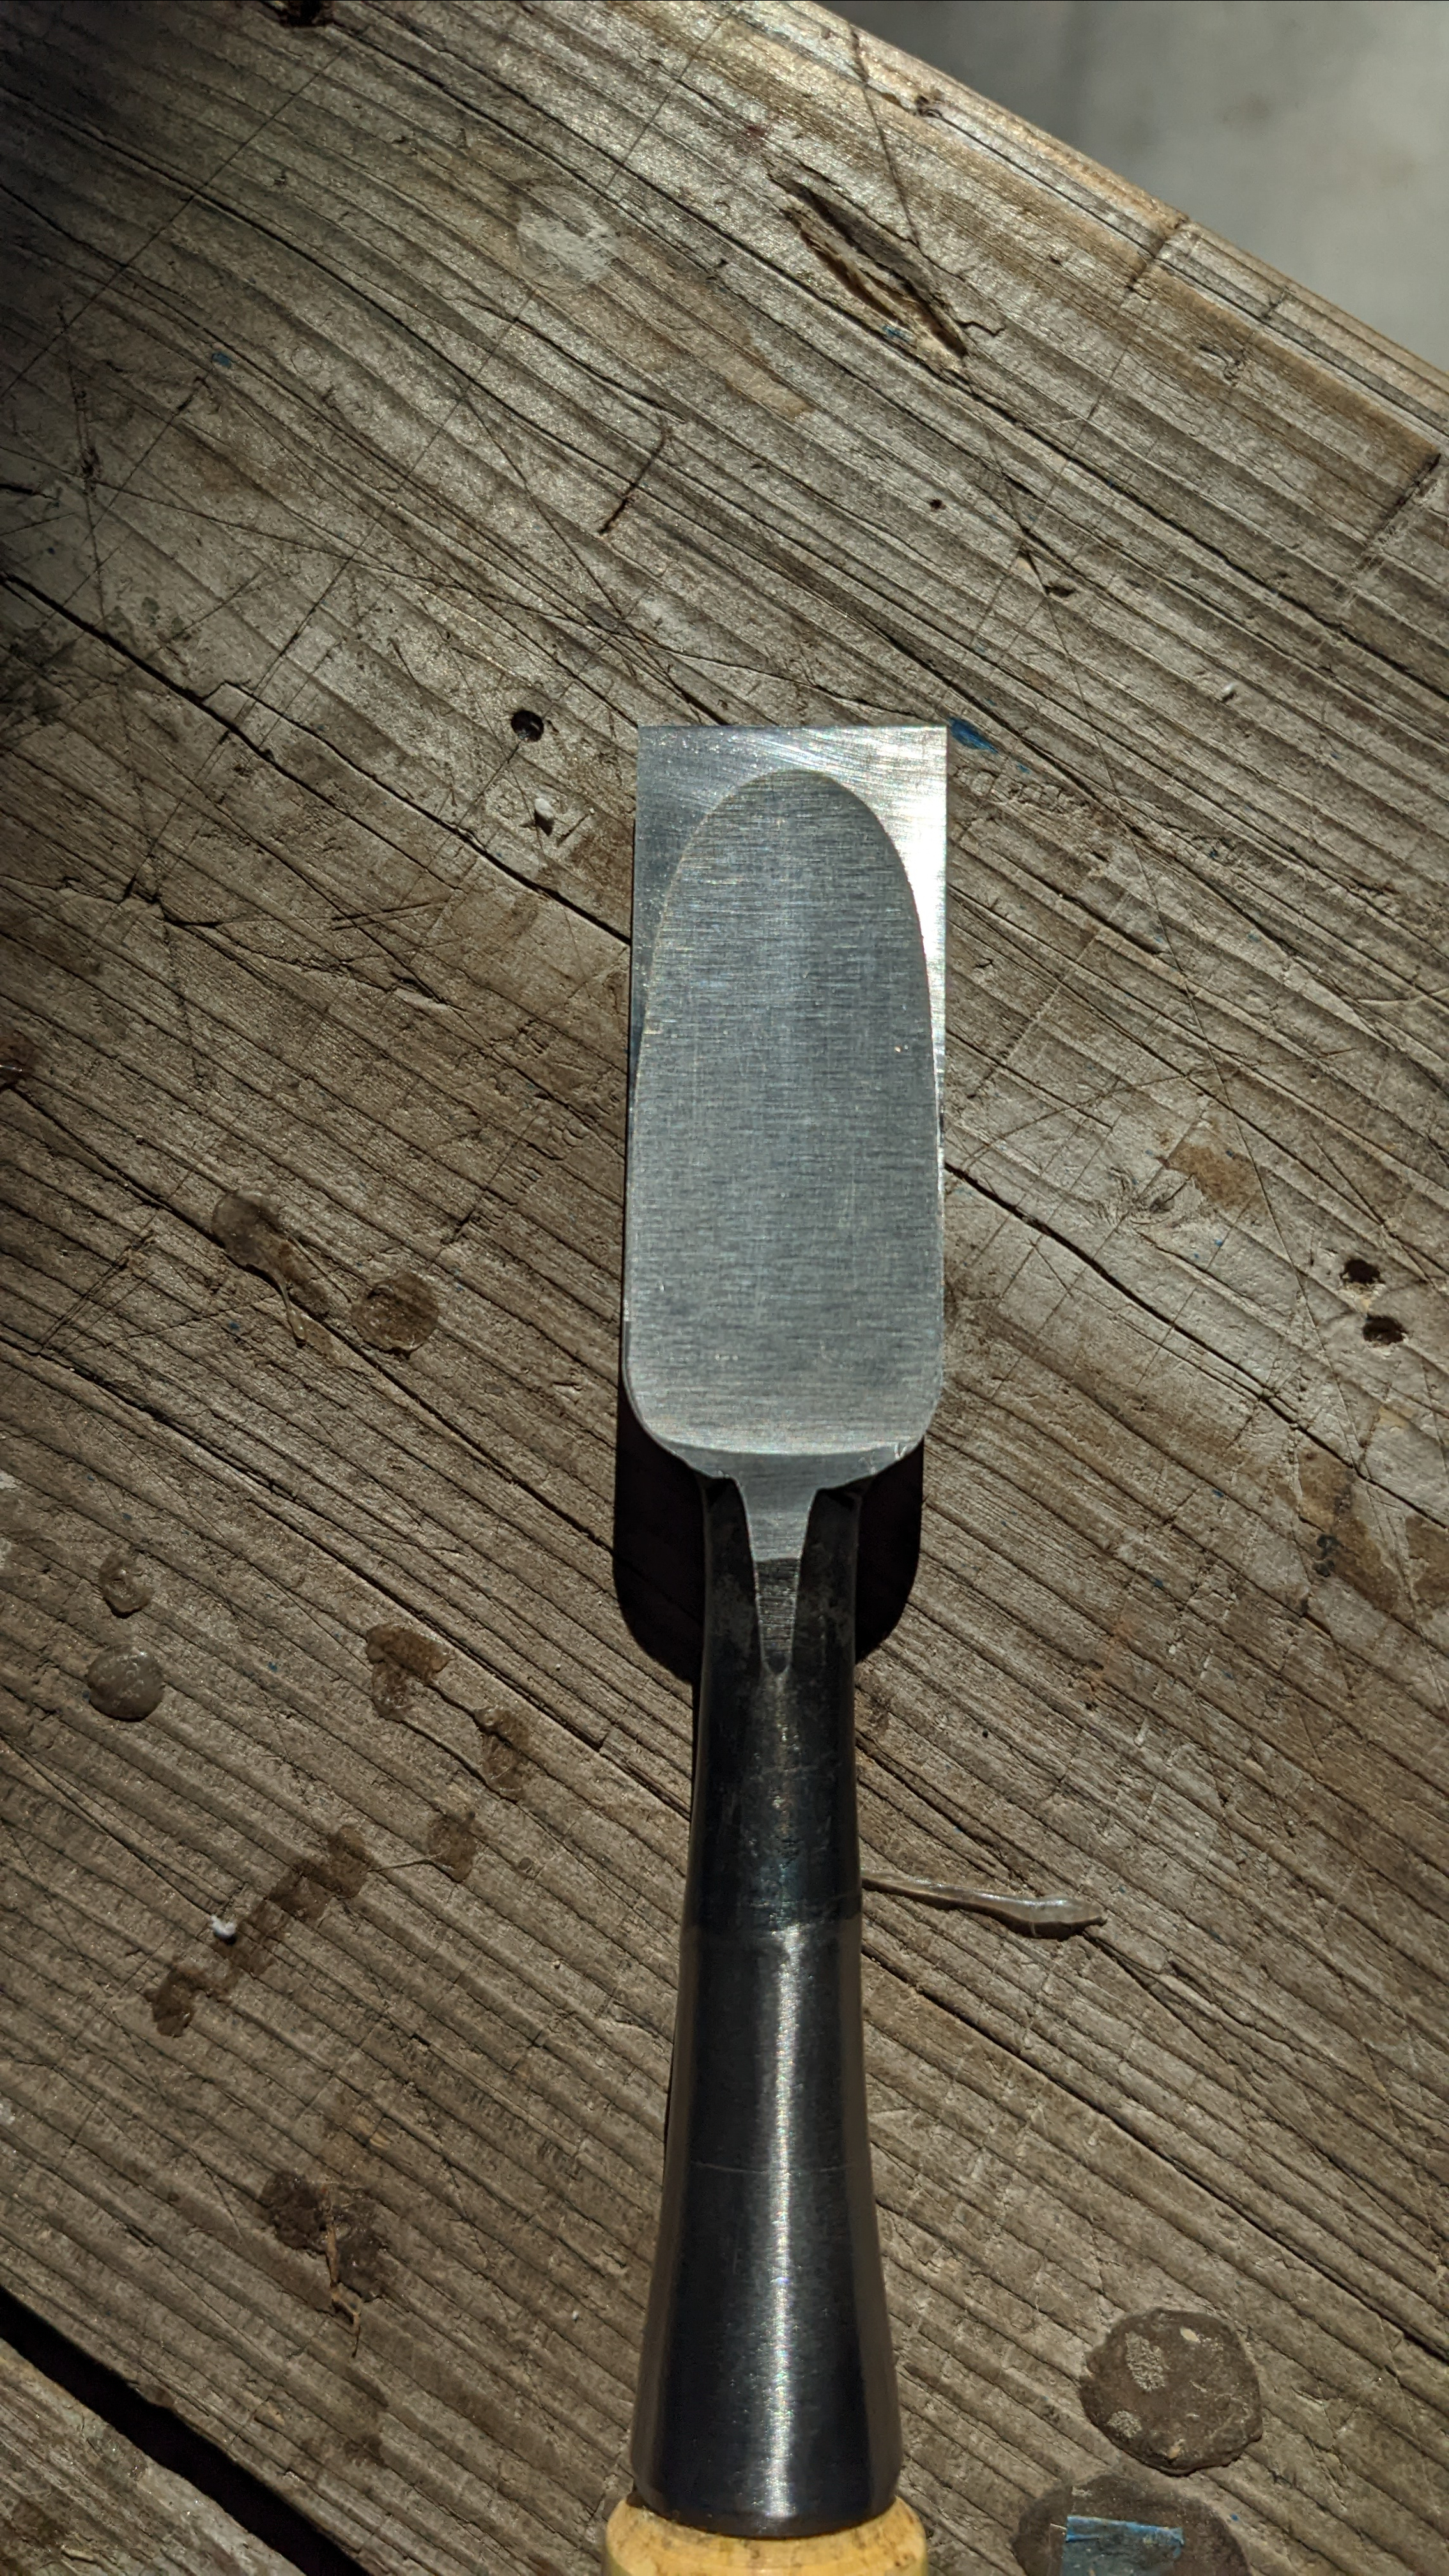
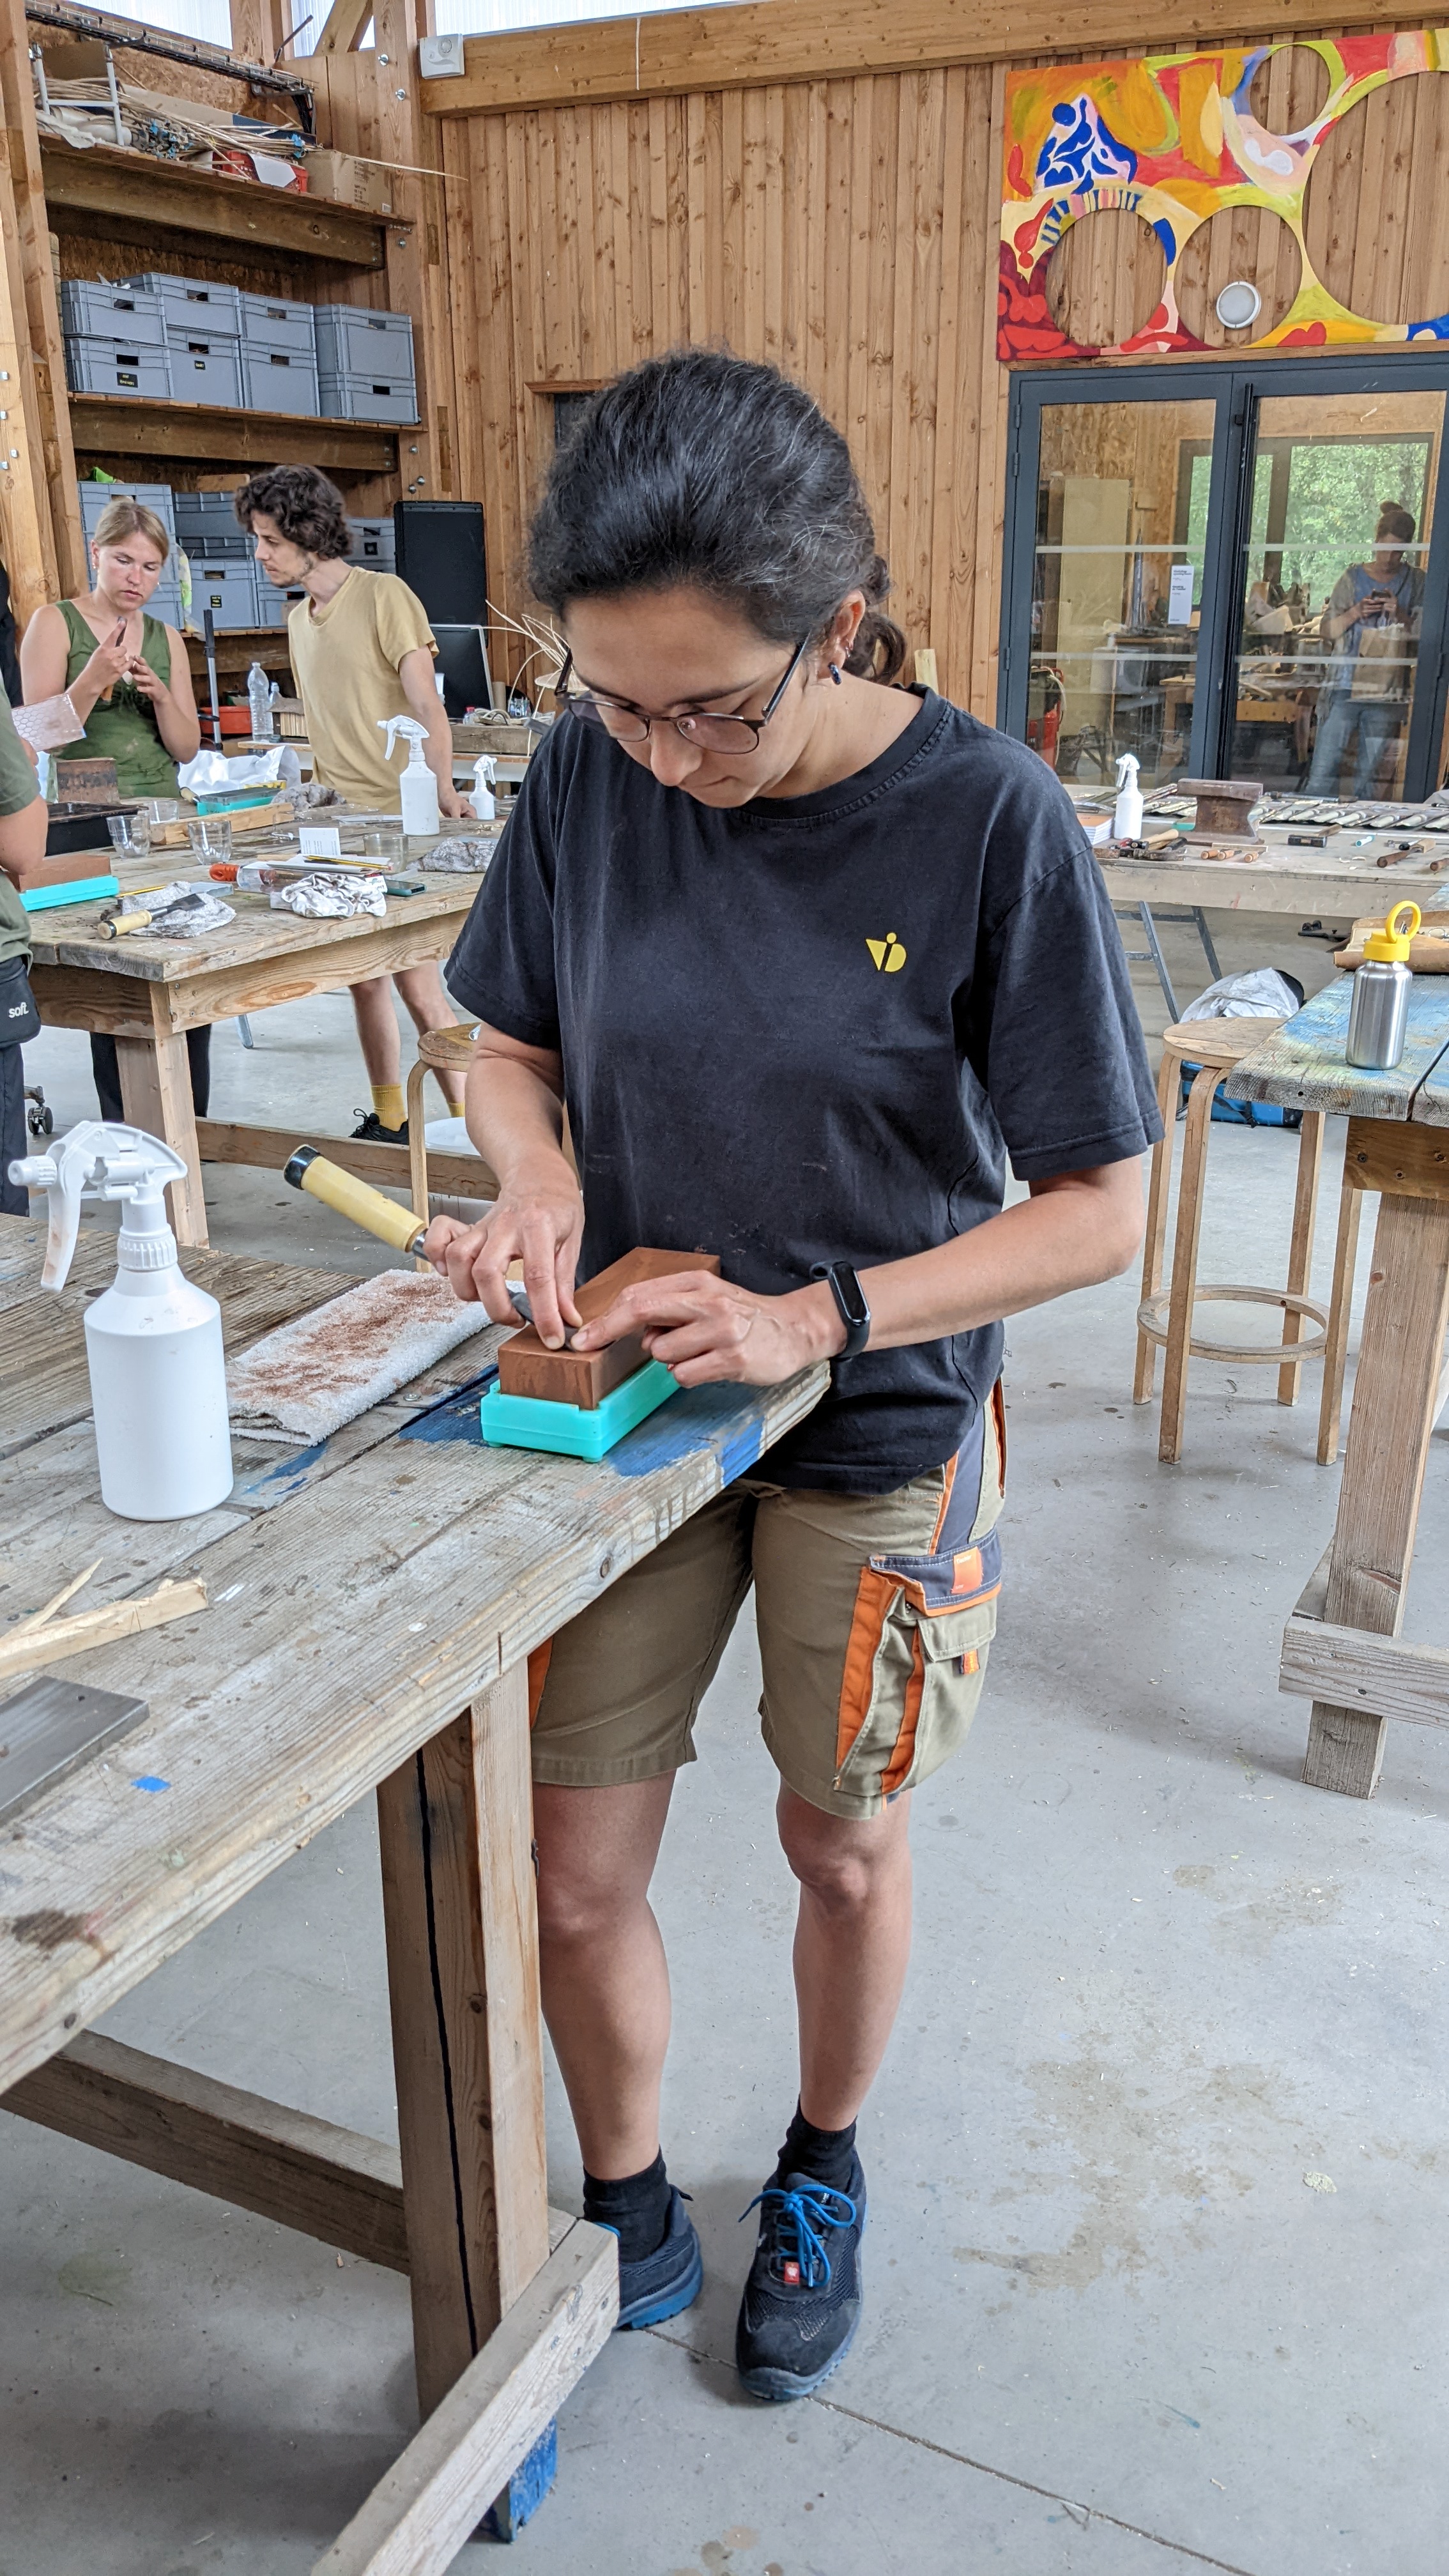

The bevel side Omoto of the chisel is first flattened using short strokes on a stone of 1000 Grit, once the entire stone has been used once, it has to be flattened using a diamond stone. This process is repeated until an even colour is visible on the bevel and a slight burr can be felt on the back of the chisel. Pressure should be applied on the tip of the chisel while making sure not to round the bevel and keeping it flat on the stone.
The burr is then removed with a 8000 grit stone, and then the bevel side is polished and finished until a uniform shine is visible from corner to corner. The corners should be sharp, and there should be no chips in the edge. The last stroke is done on the flat side to remove any remaining burr.
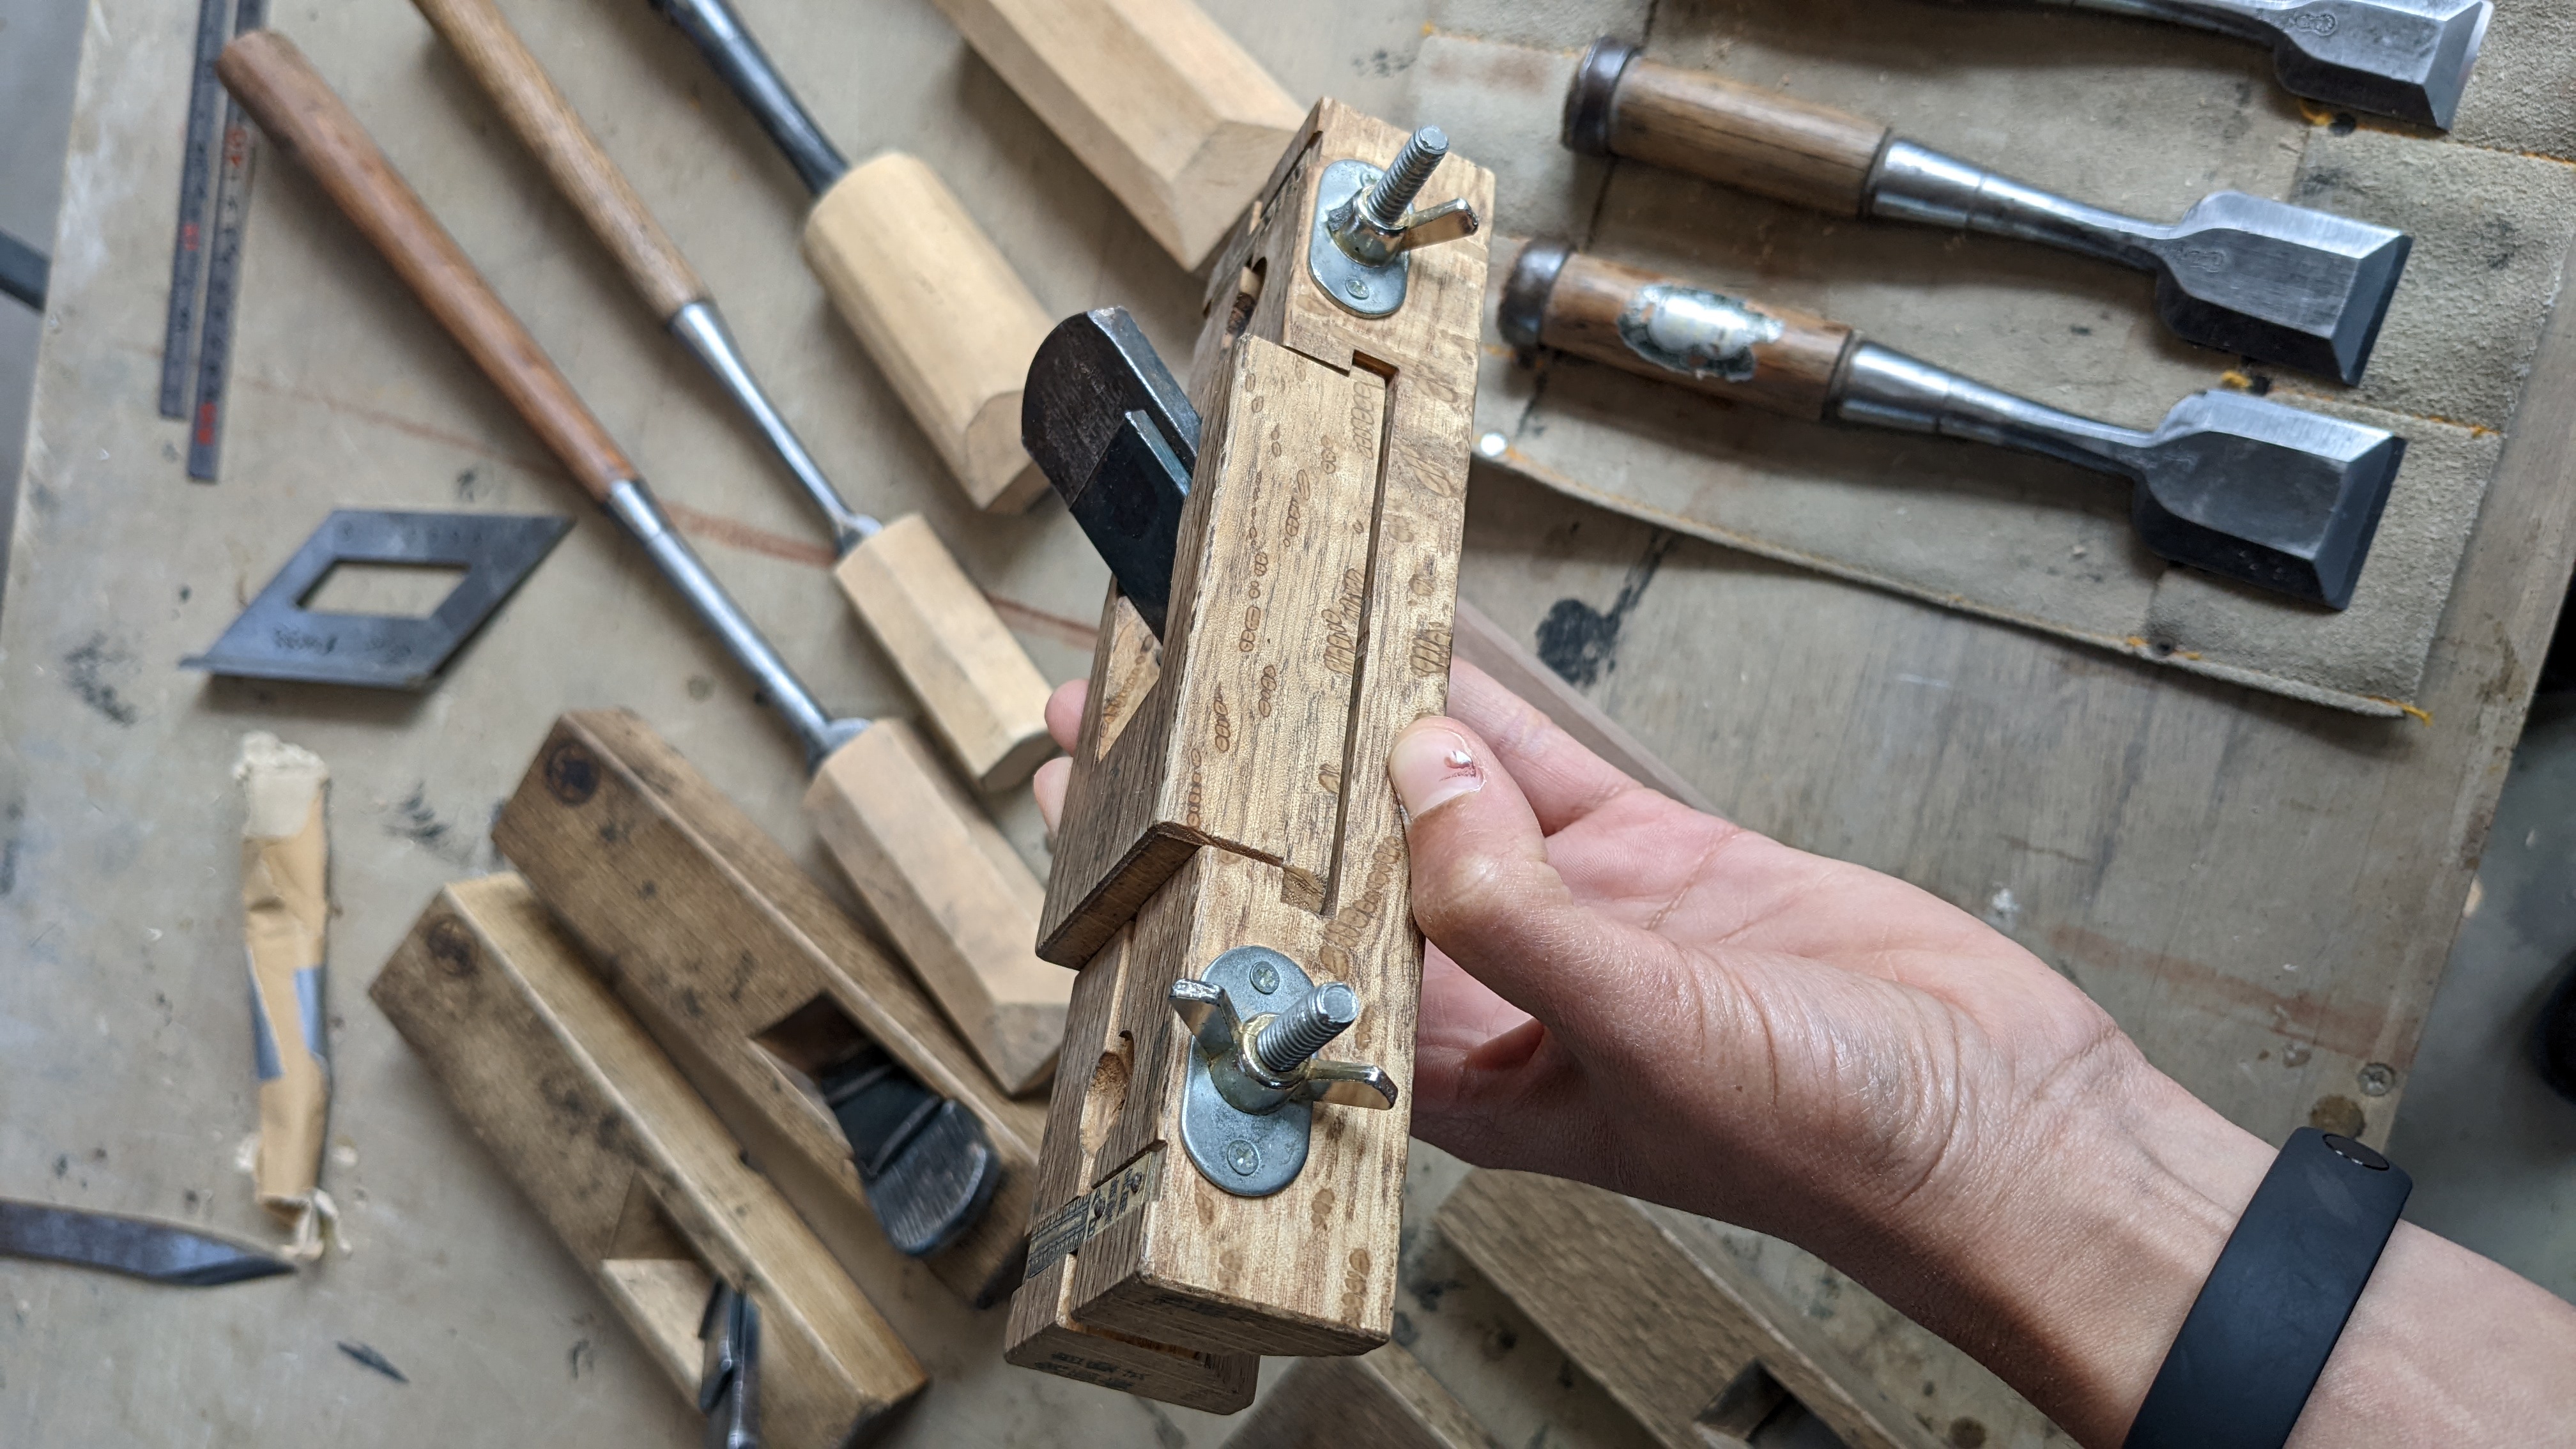
Adjusting and Sharpening A Handplane
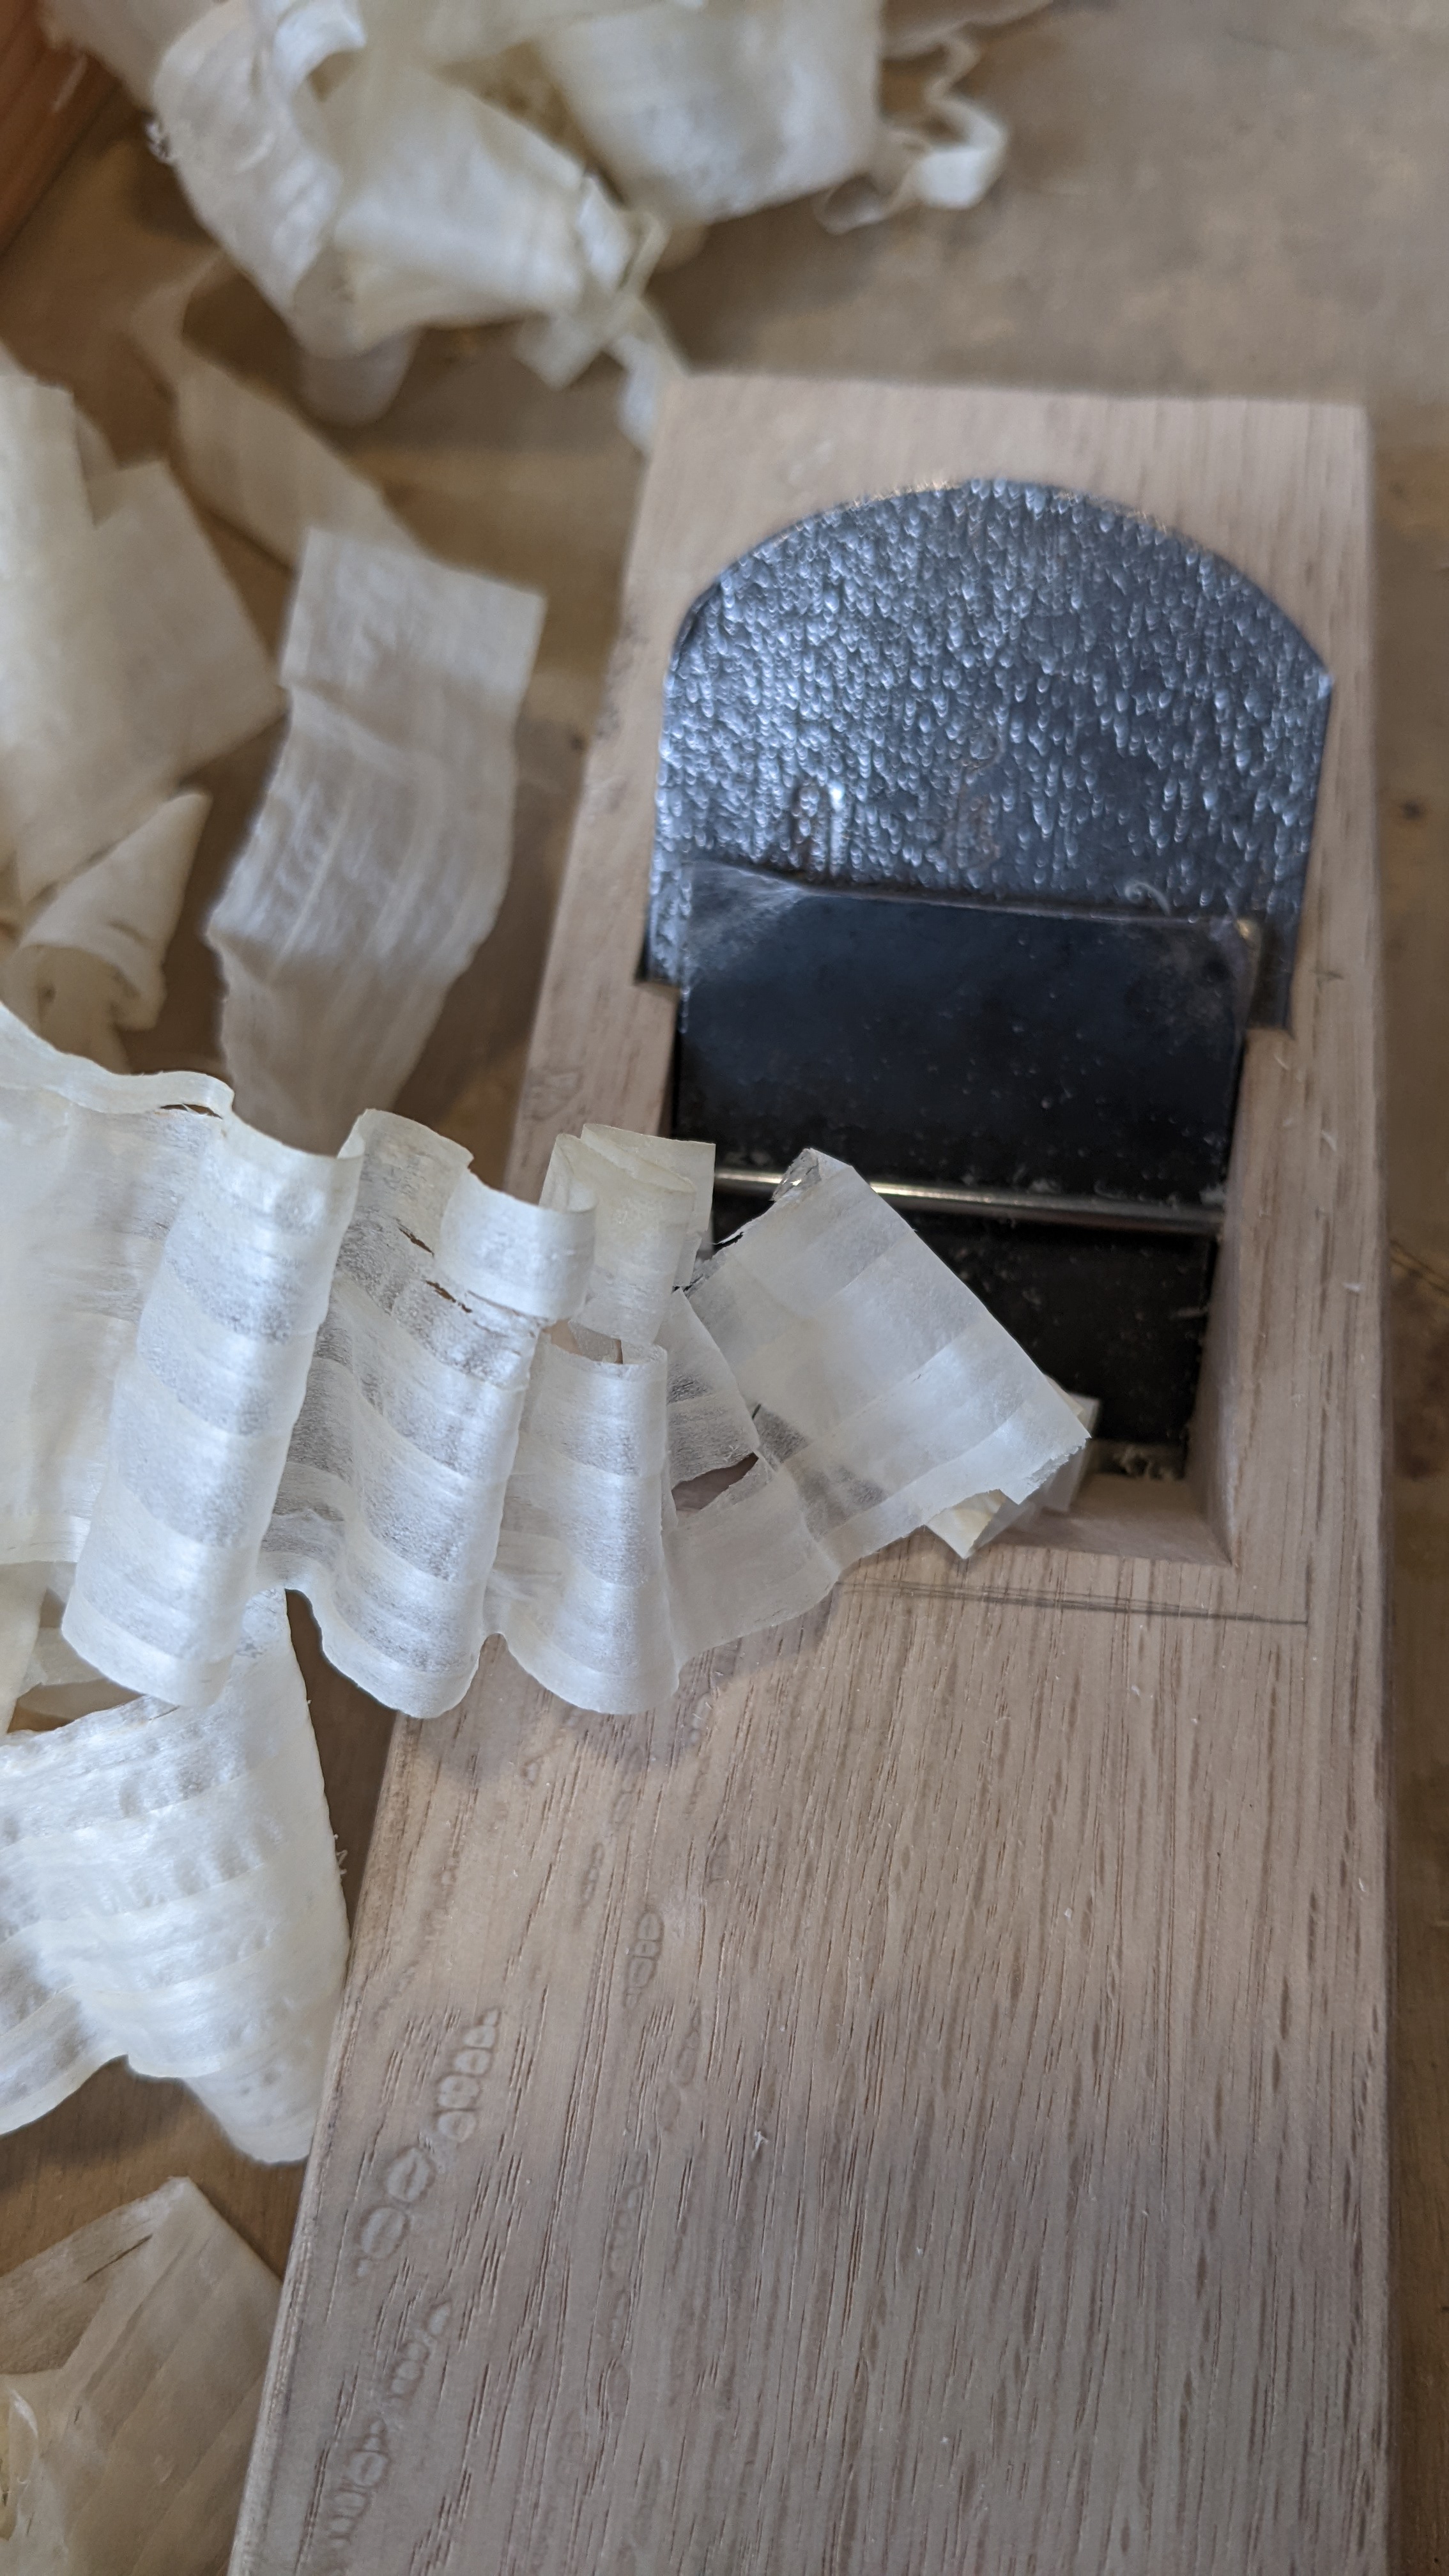
The Handplane or Kanna also has to be adjusted and sharpened before it can be used. The wooden body, the metal blade and the chipbreaker need to be adjusted to work in perfect harmony to achieve the desired results.
The process of sharpening the Kanna blade is similar to that of a chisel, starting with the flat side and then moving onto the bevel to achieve an even shine across the entire width of the blade.
The back of the chipbreaker is also flattened so it is in even contact with the back of the blade, first on an anvil and then on a metal plate. This way it is optimally performing its function. Pressing both tips together, the corners of the chipbreaker need to be adjusted so that there is no wobbling. The distance of between the tips of chipbreaker and blade should be a hair’s width.

Finally, the mouth and the bottom of the kanna have to be adjusted. The mouth is adjusted until the blade fits in easily, if its too tight, it might split the wooden body of the kanna. Once blade is fitted, only then is the bottom of the kanna adjusted. Only 2 strips on the bottom surface touch the material while planing. About 10 mm at the very front of the plane and 10 mm just before the opening of the plane touch the material. Everything needs to be scraped or sanded away so it is just a little bit lower. With a straightedge against the light, these high- and low-points become visible. As the final step, the high areas on the hand plane bottom are flattened on a 240 grit sandpaper on a glass piece.
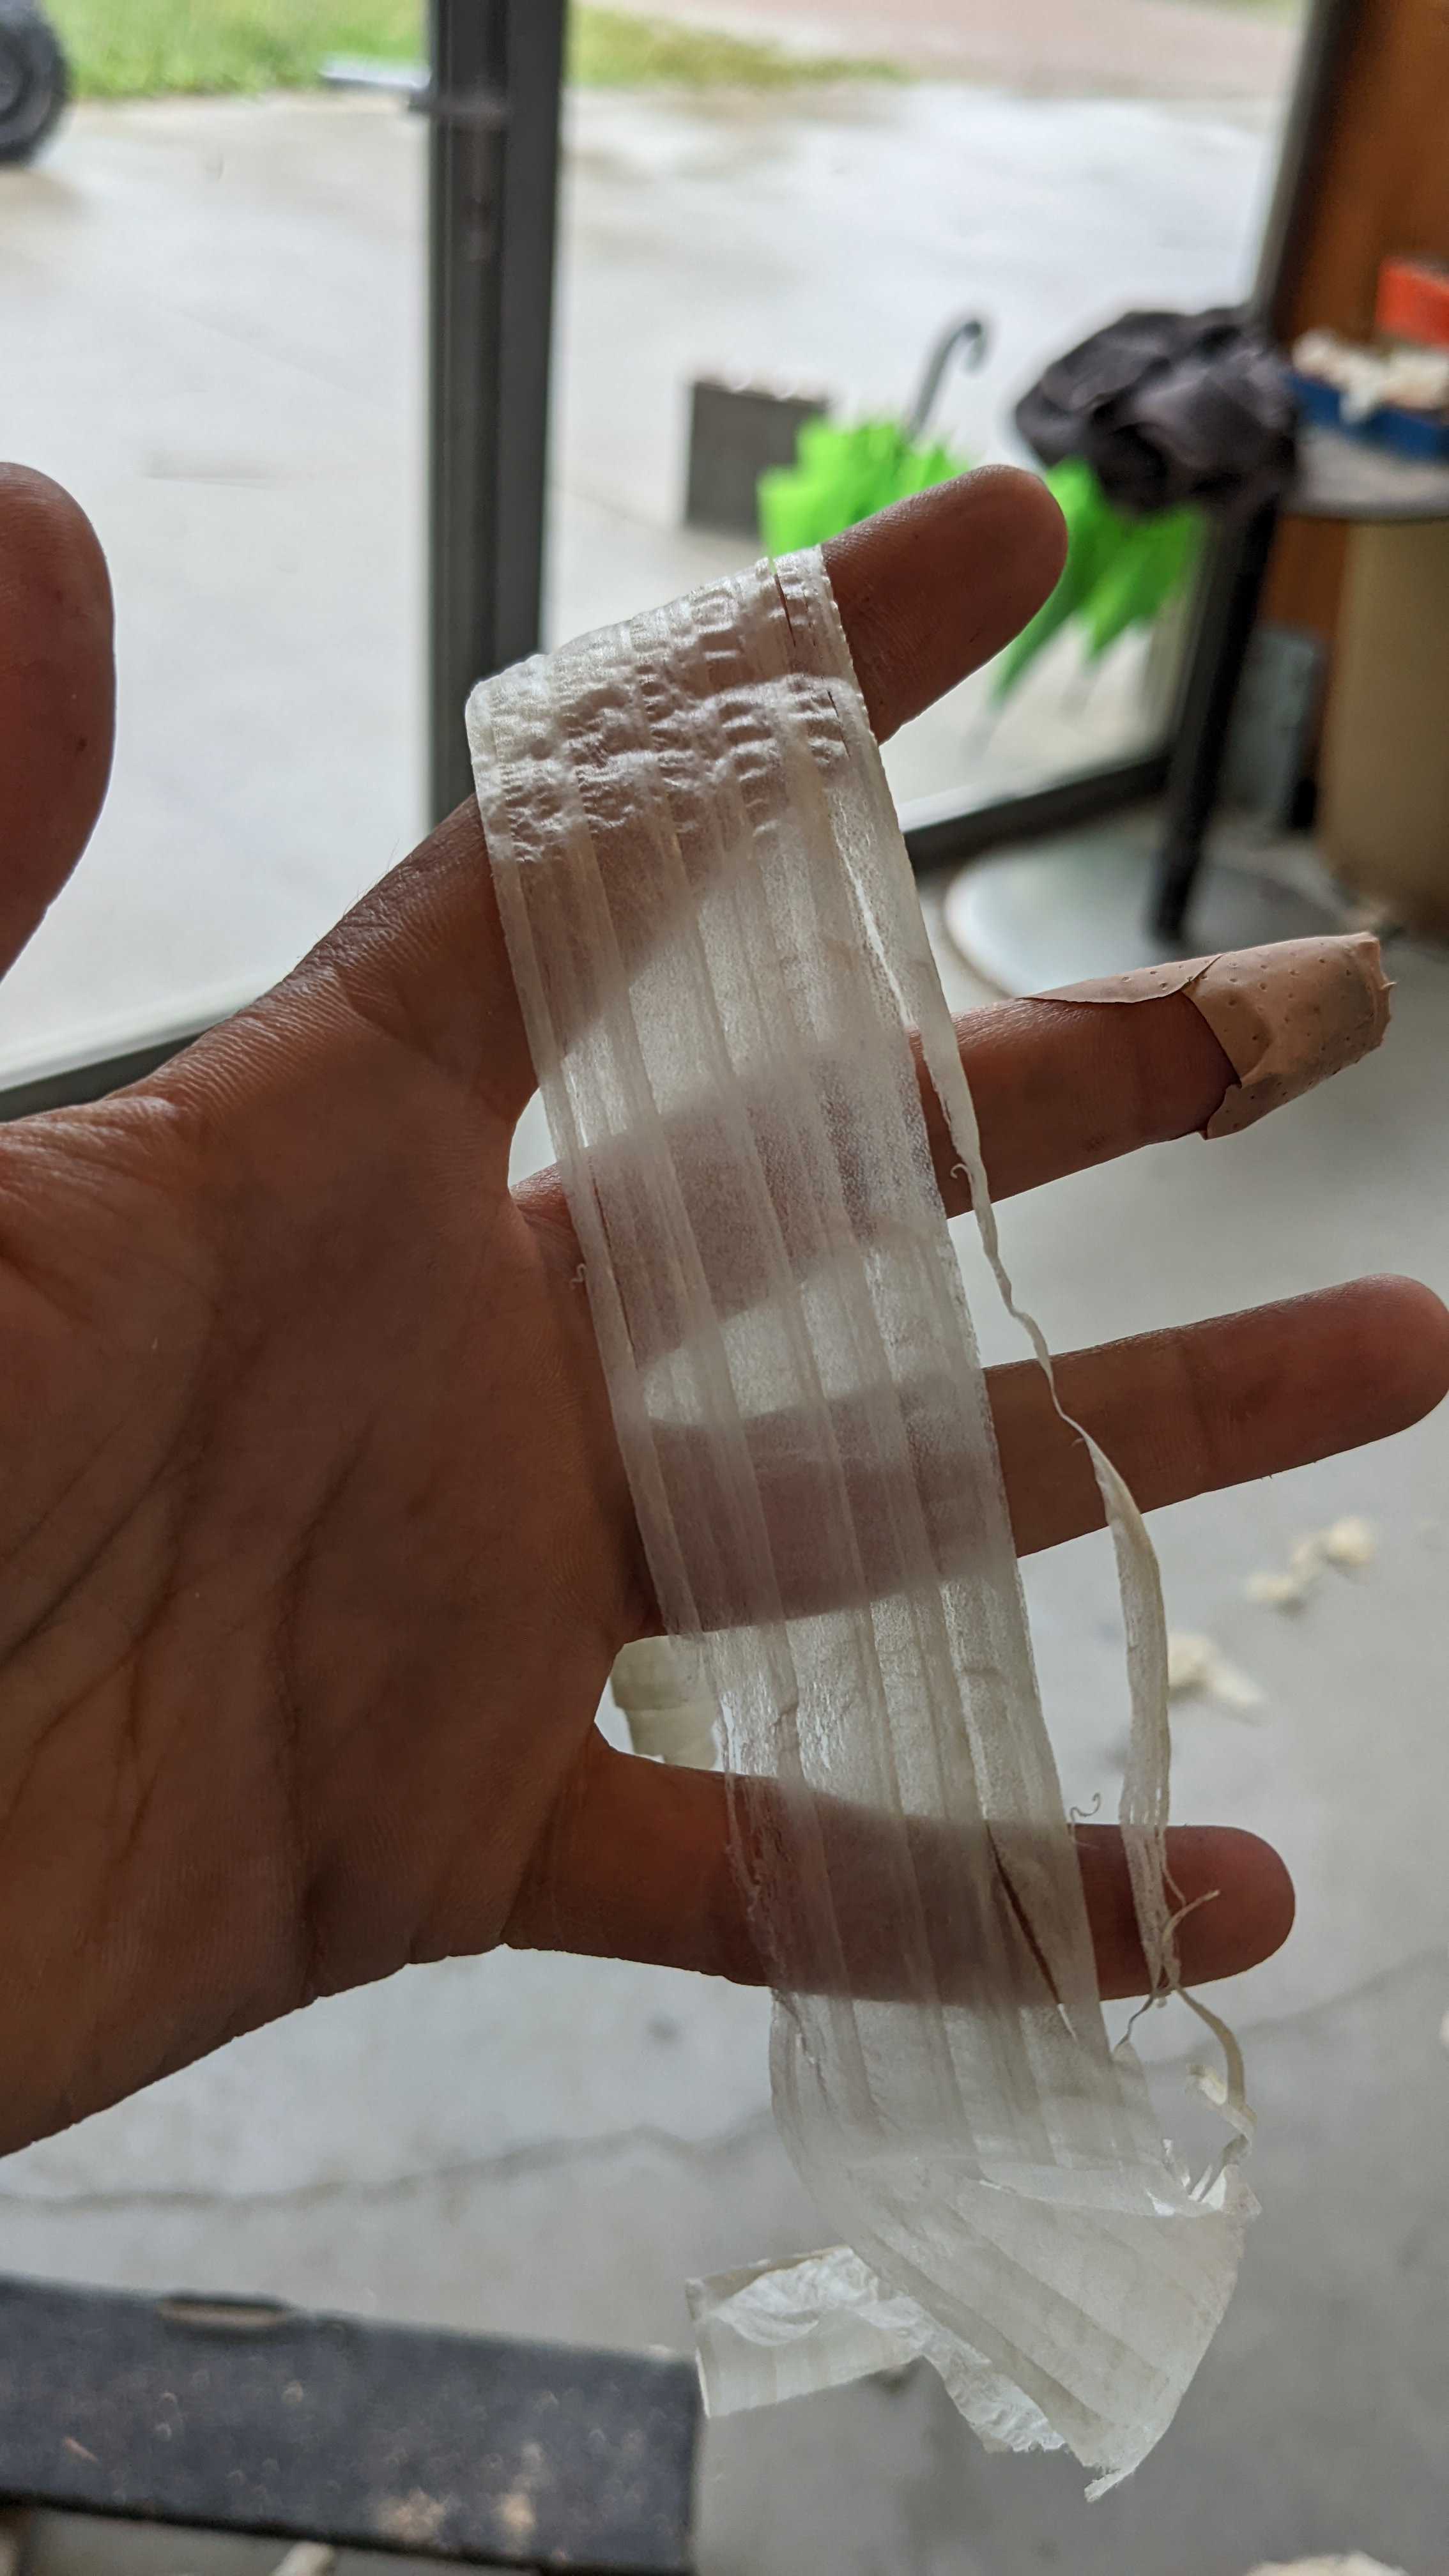
Time to test the hand plane and see if it is working perfectly or not. The shaving should be paper thin, almost see-through. There should not be any tear-out. If the shaving is wrinkled, it means the chip breaker is working well.


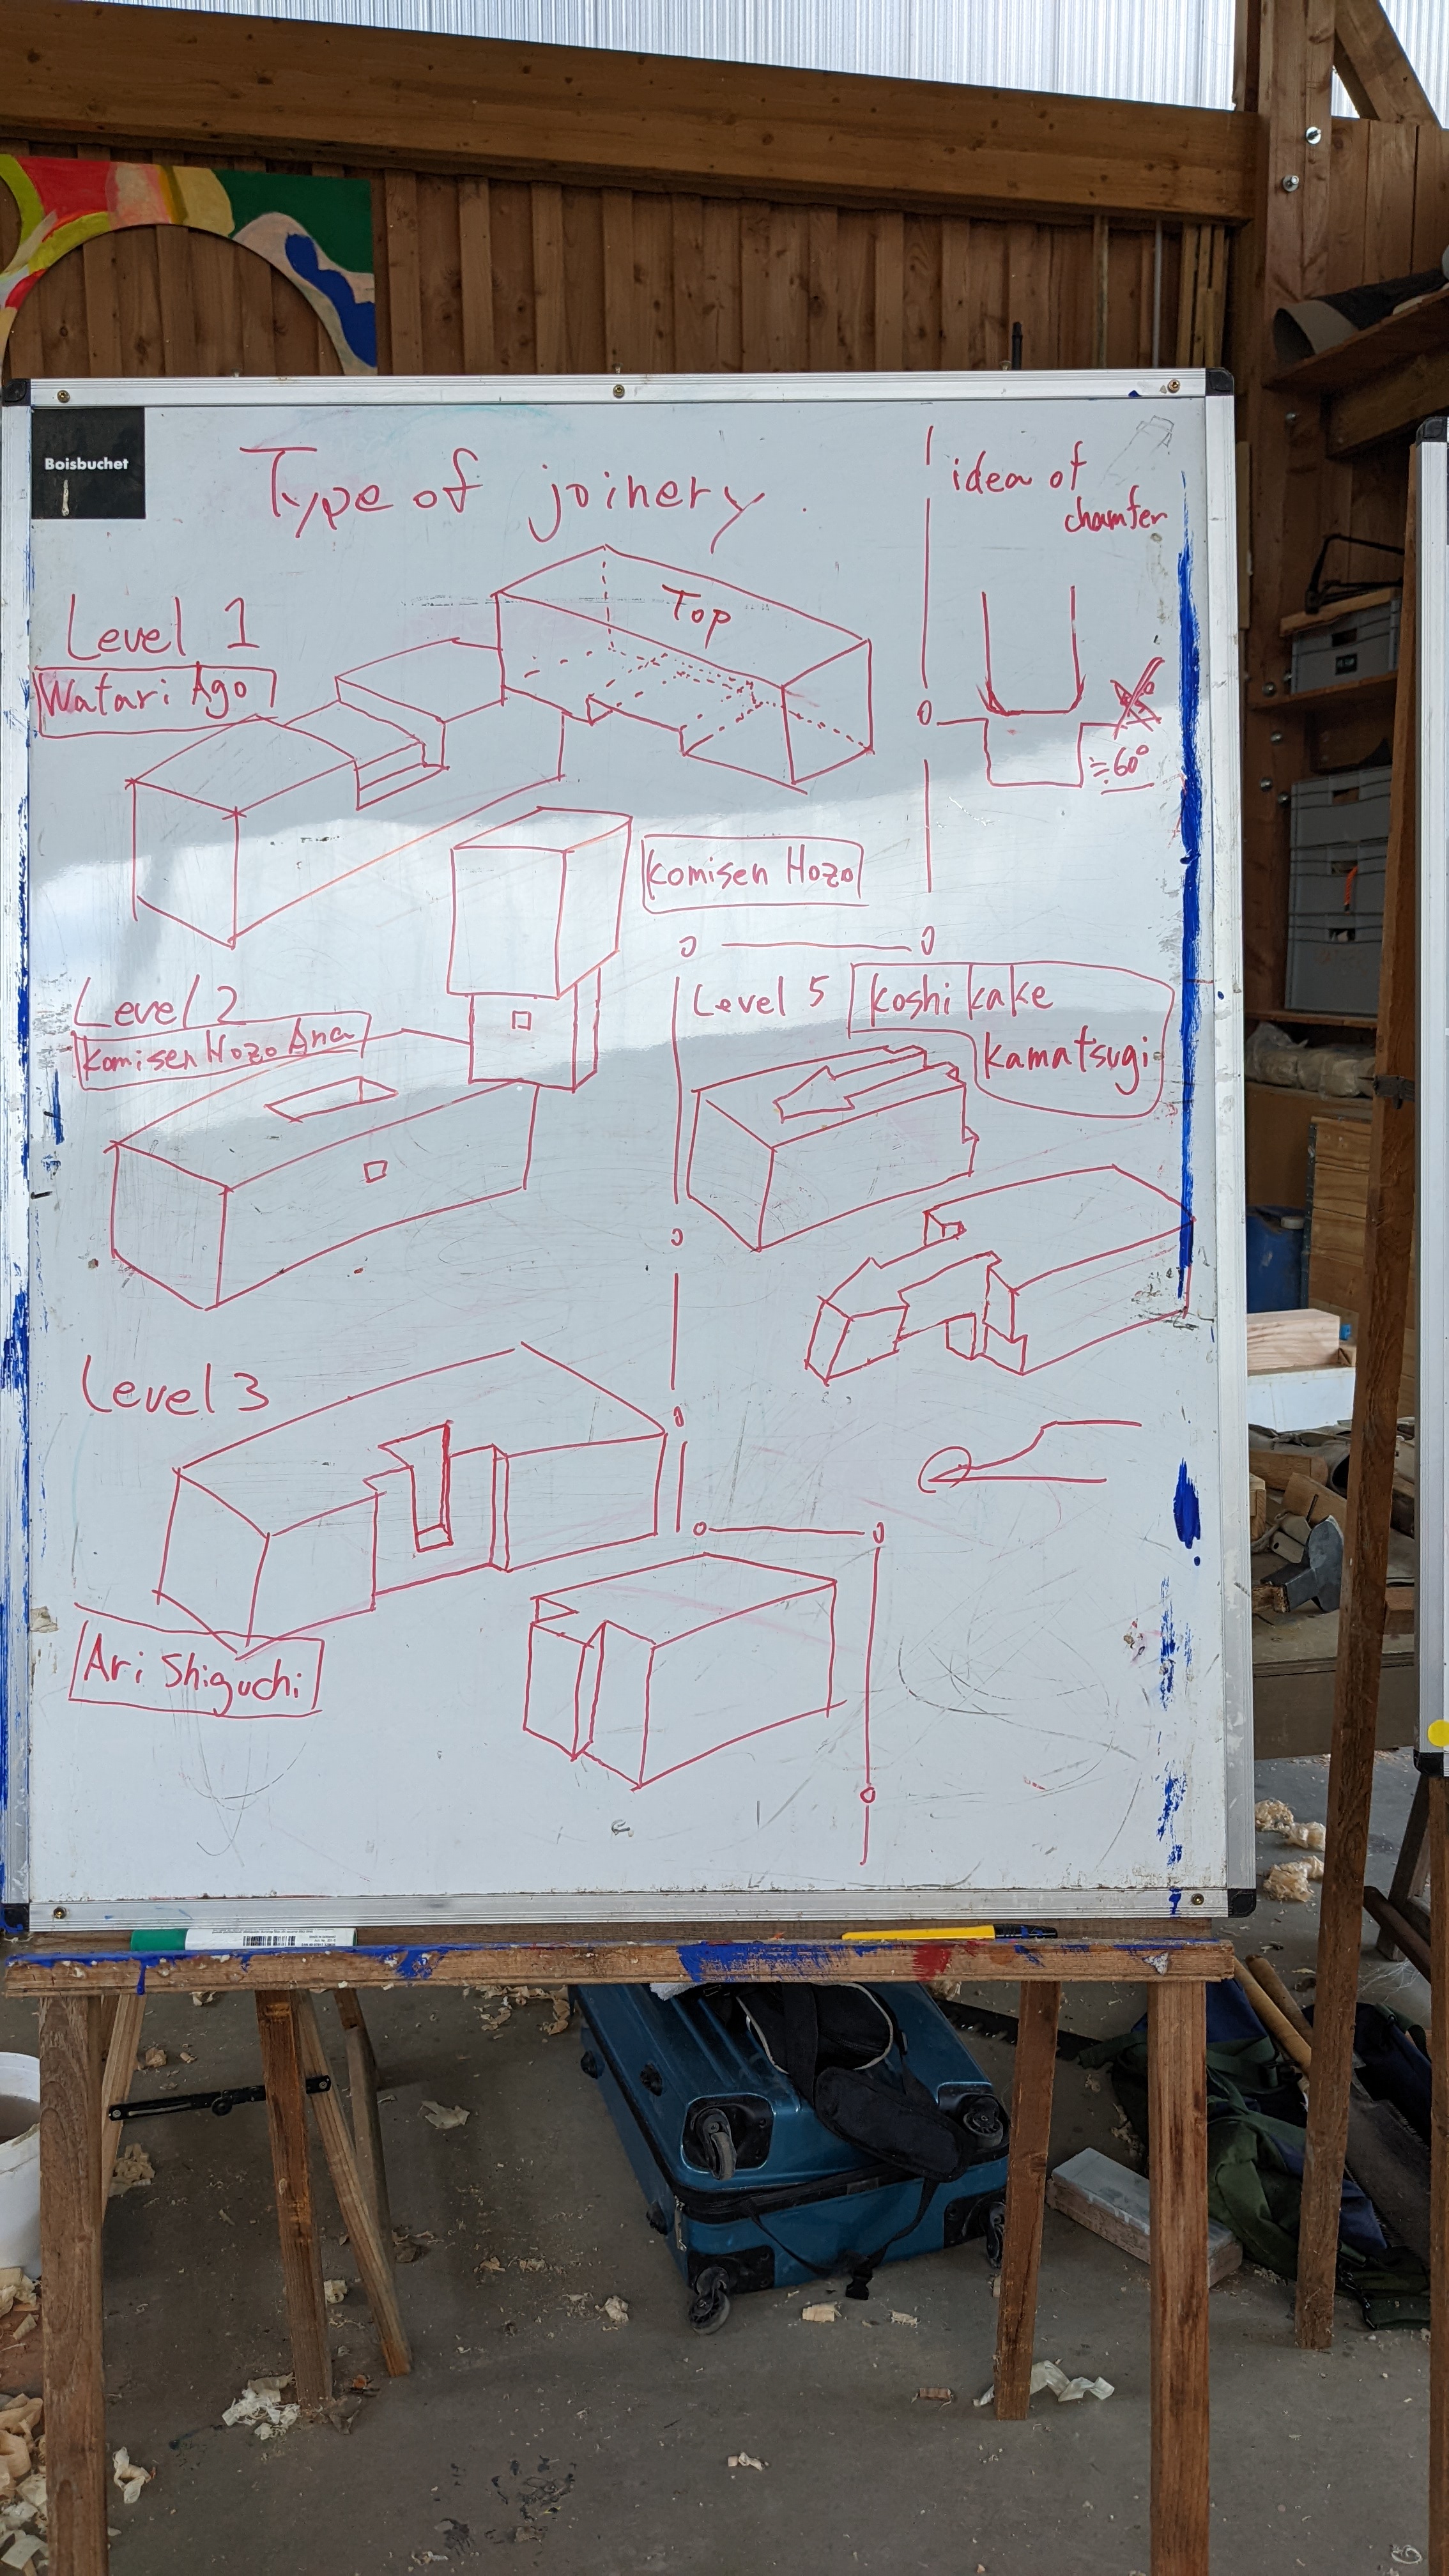
Making a Koshi Kake Aritsugi
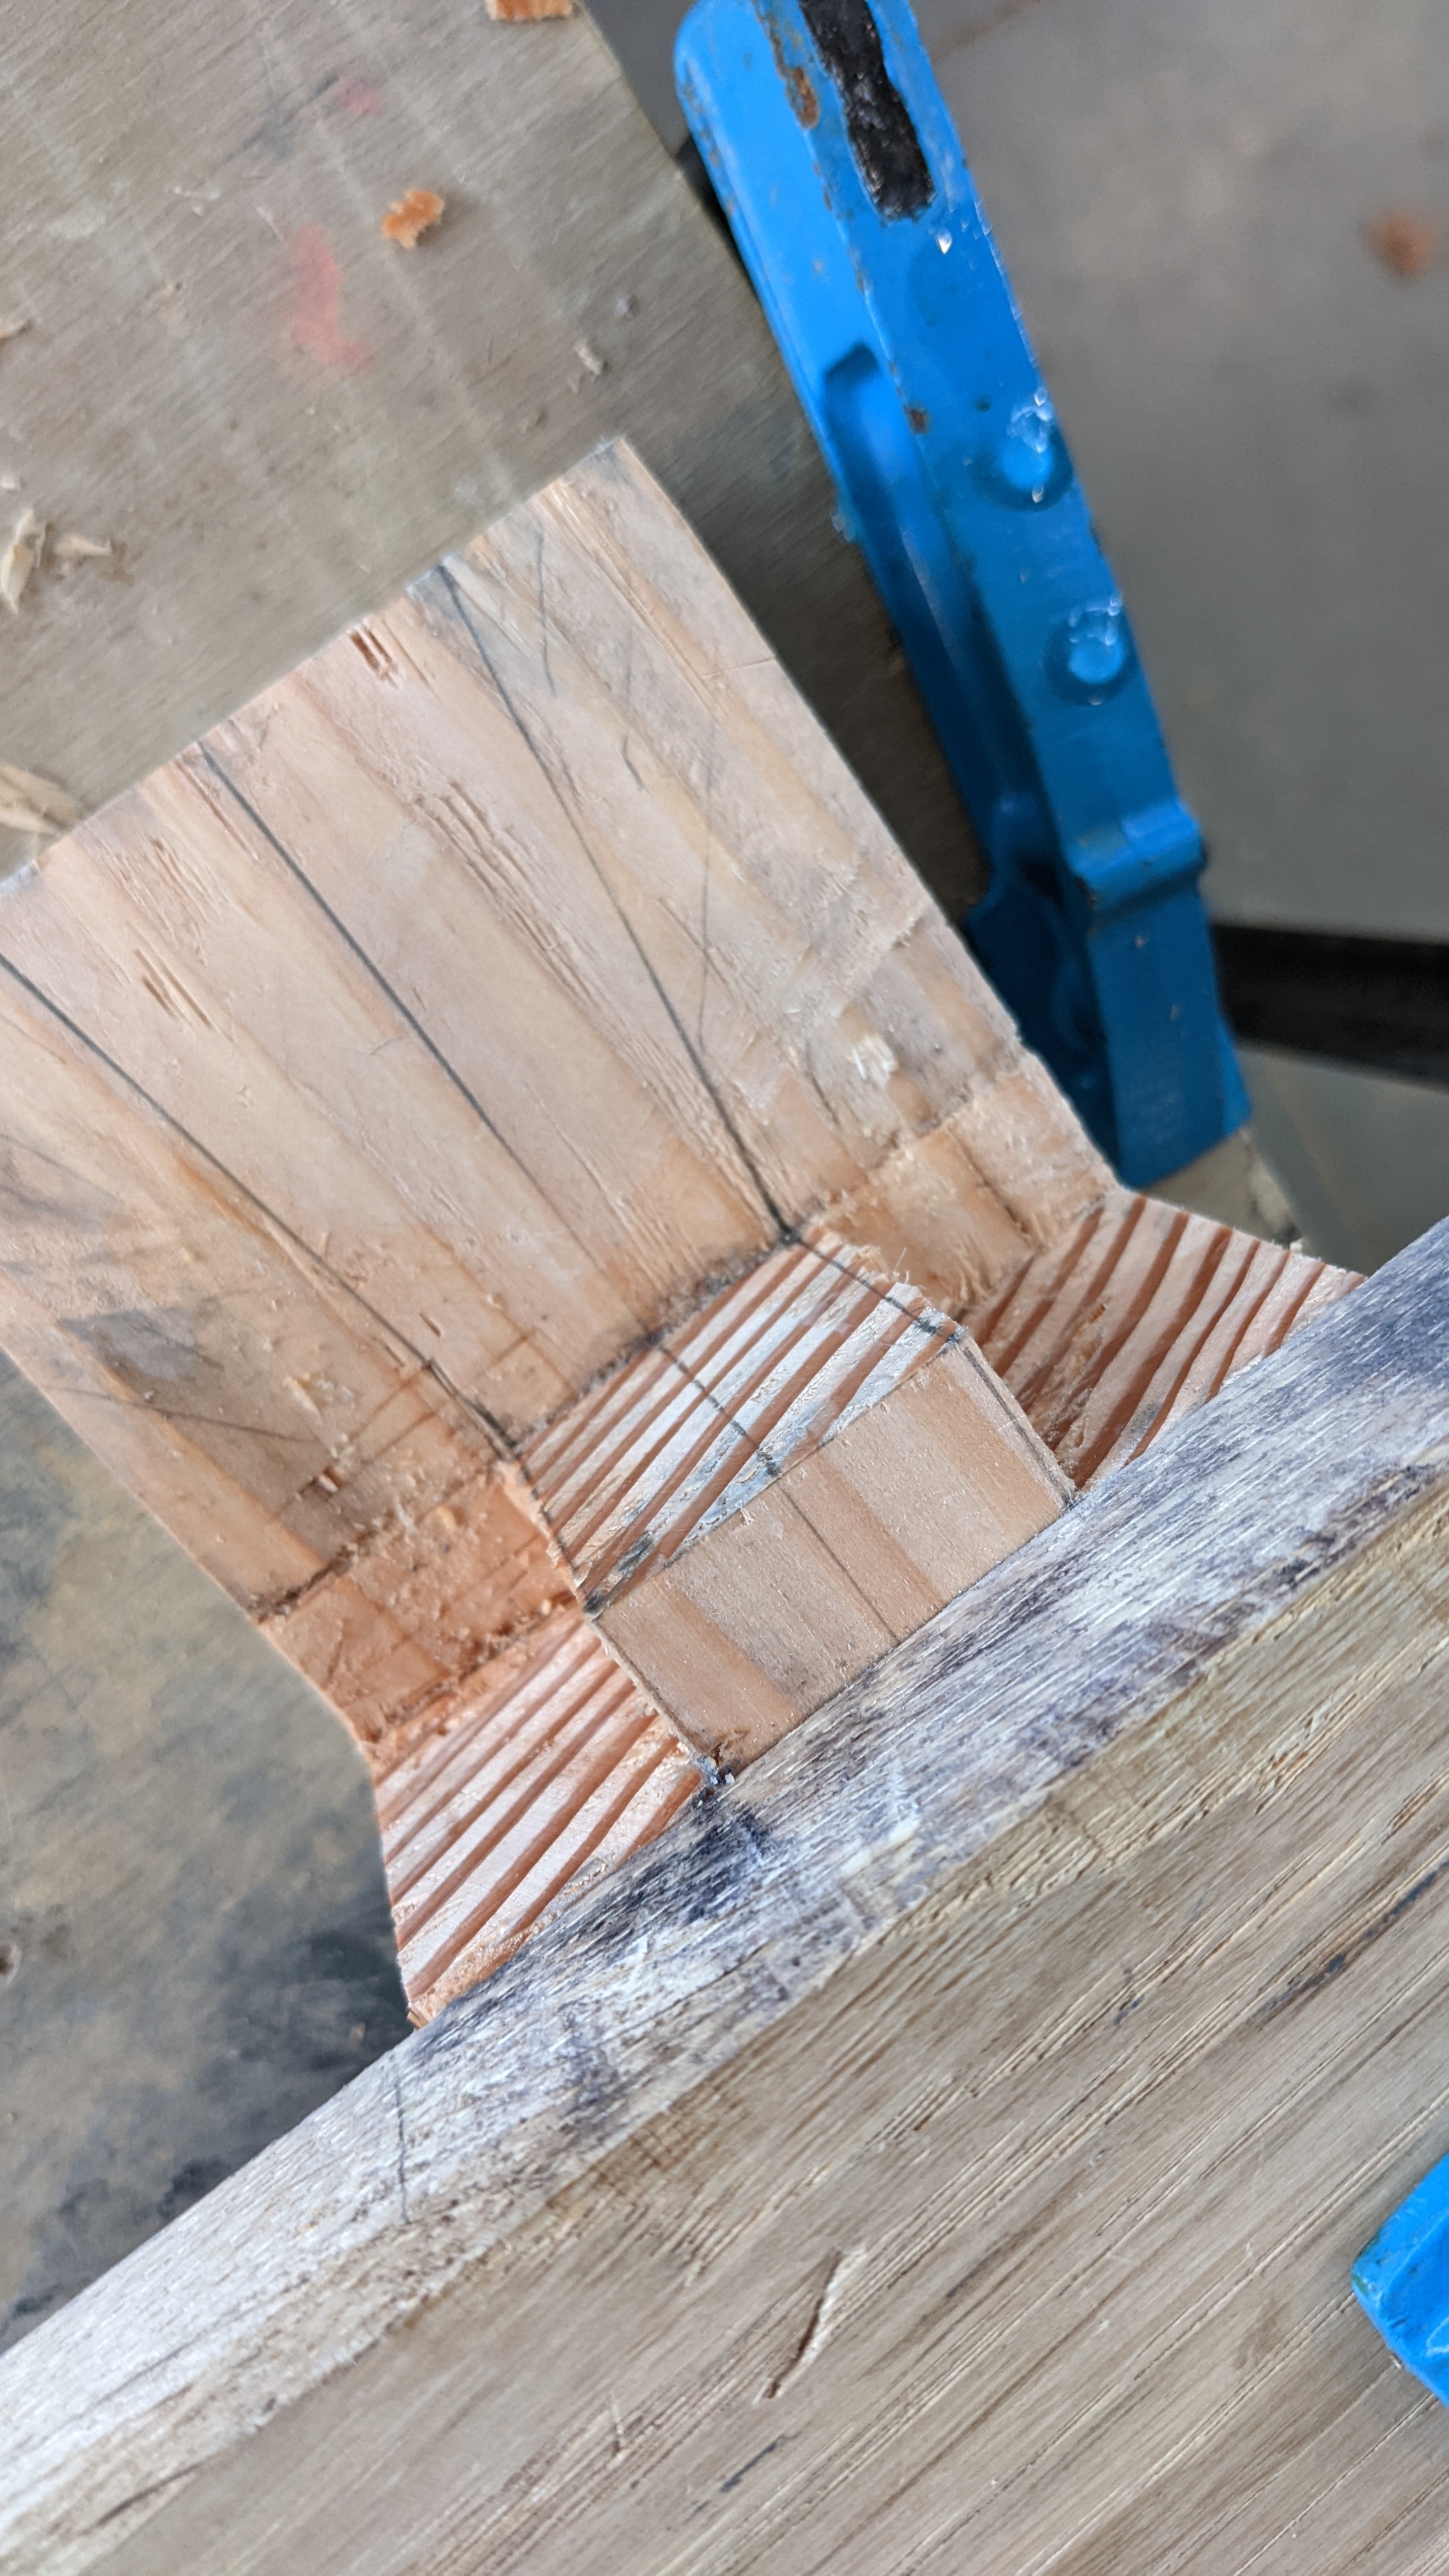
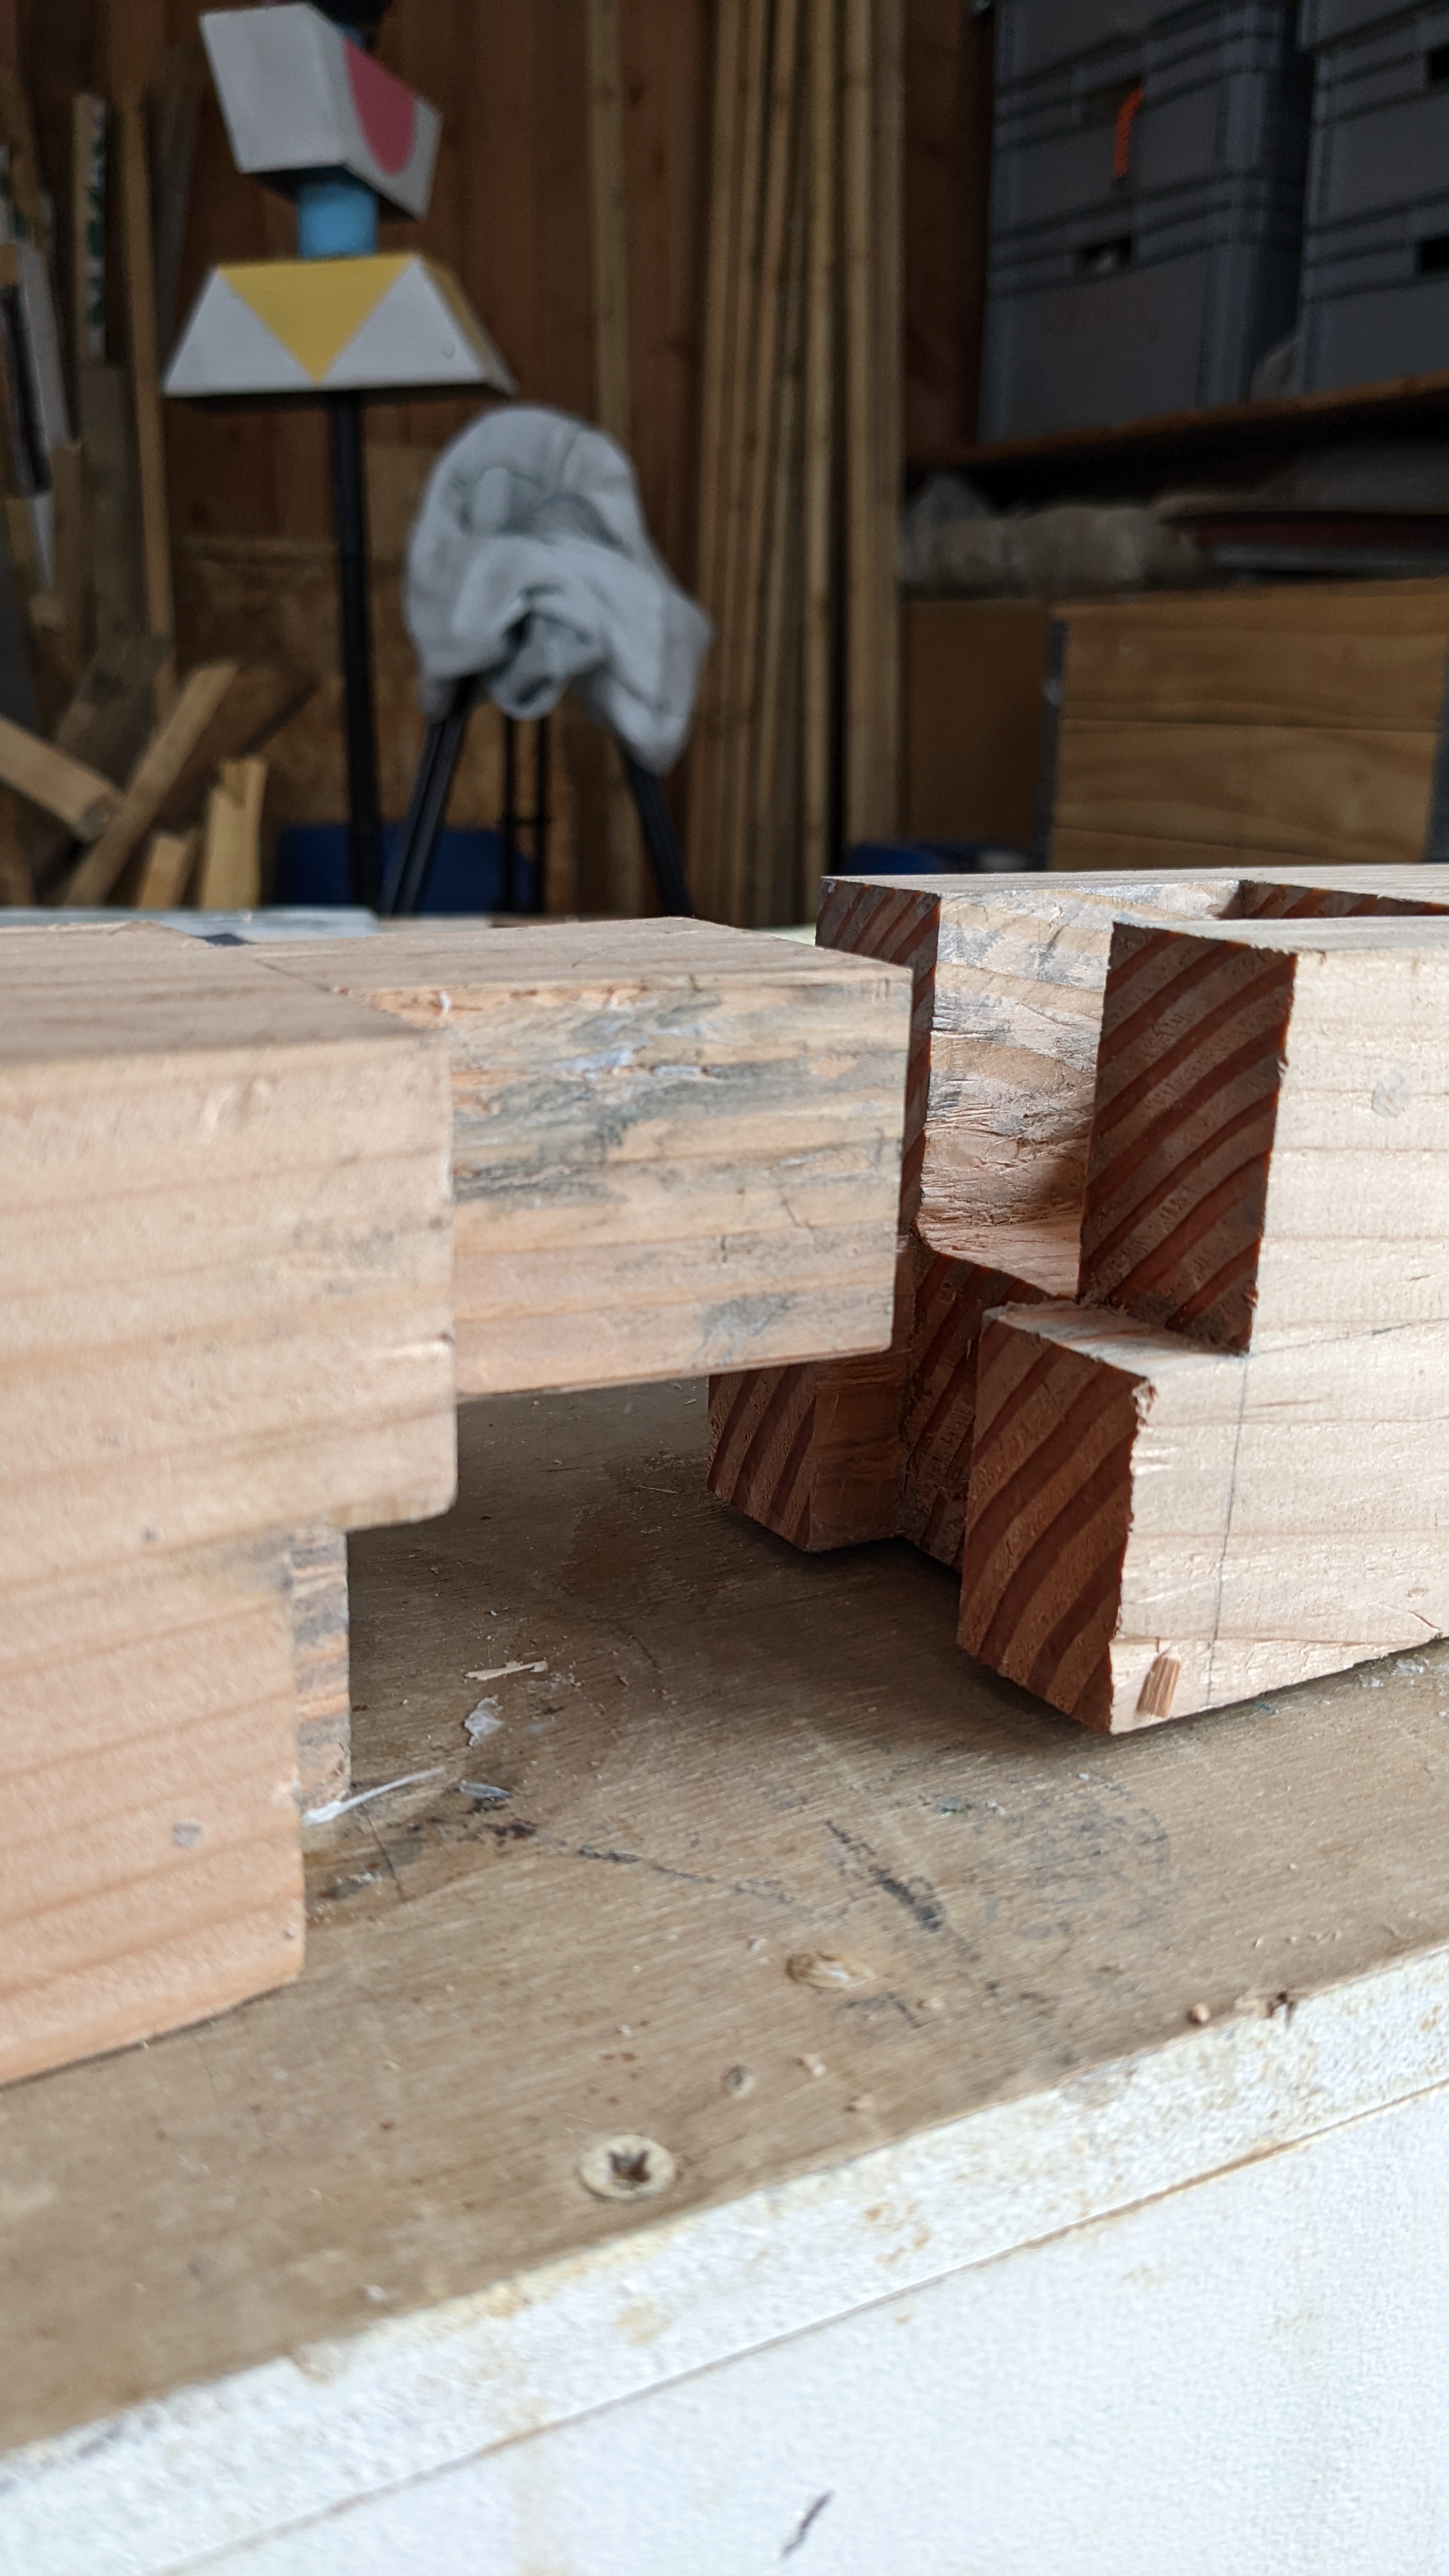
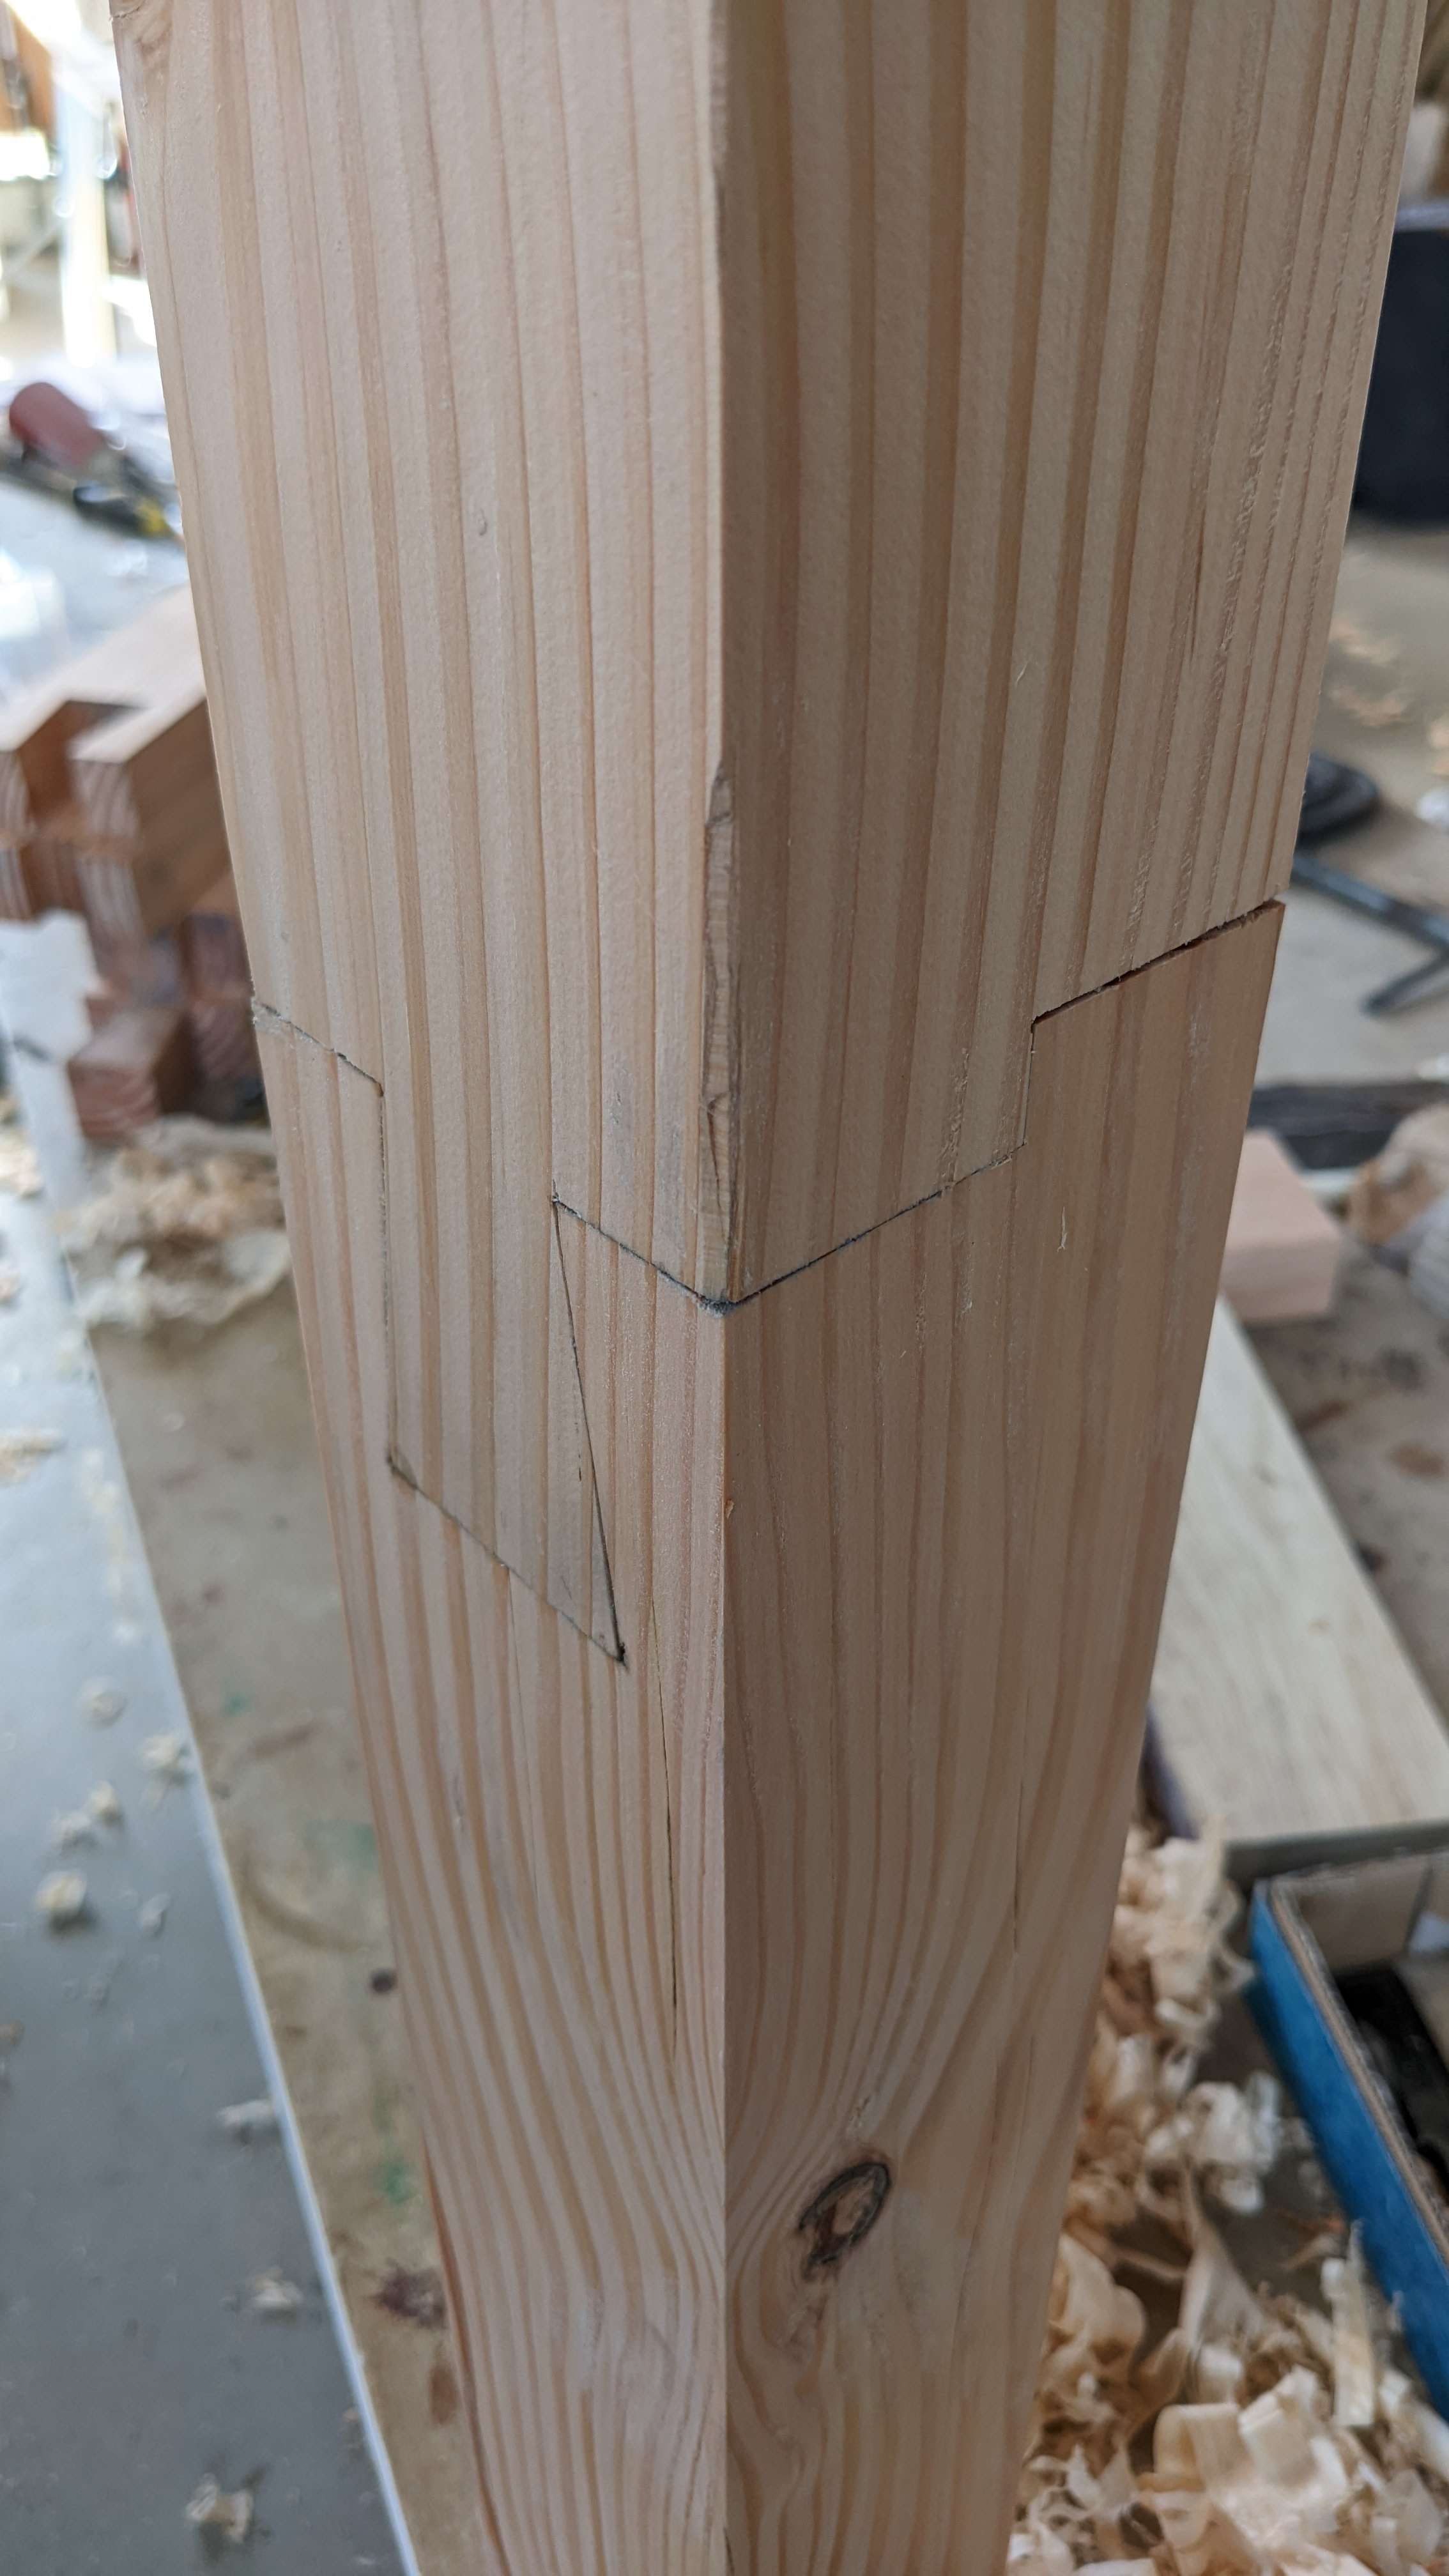
Using the tools we had adjusted and sharpened, it was now time to try our hands at actually making a traditional Japanese joint, the Koshi Kake Aritsugi, literally translated the ‘Waist Sit Anthead joint’. This joint is used in the construction of traditional Japanese wooden houses to connect beams, either to extend the length or as a T joint. It is made using two pieces of square stock, one piece receives the male part of the joint, the other the female part, fitting into each other to form a stable joint.
The marking and making of the joint was first demonstrated by Takami san, making sure to point out the correct technique and pressure points of each step.
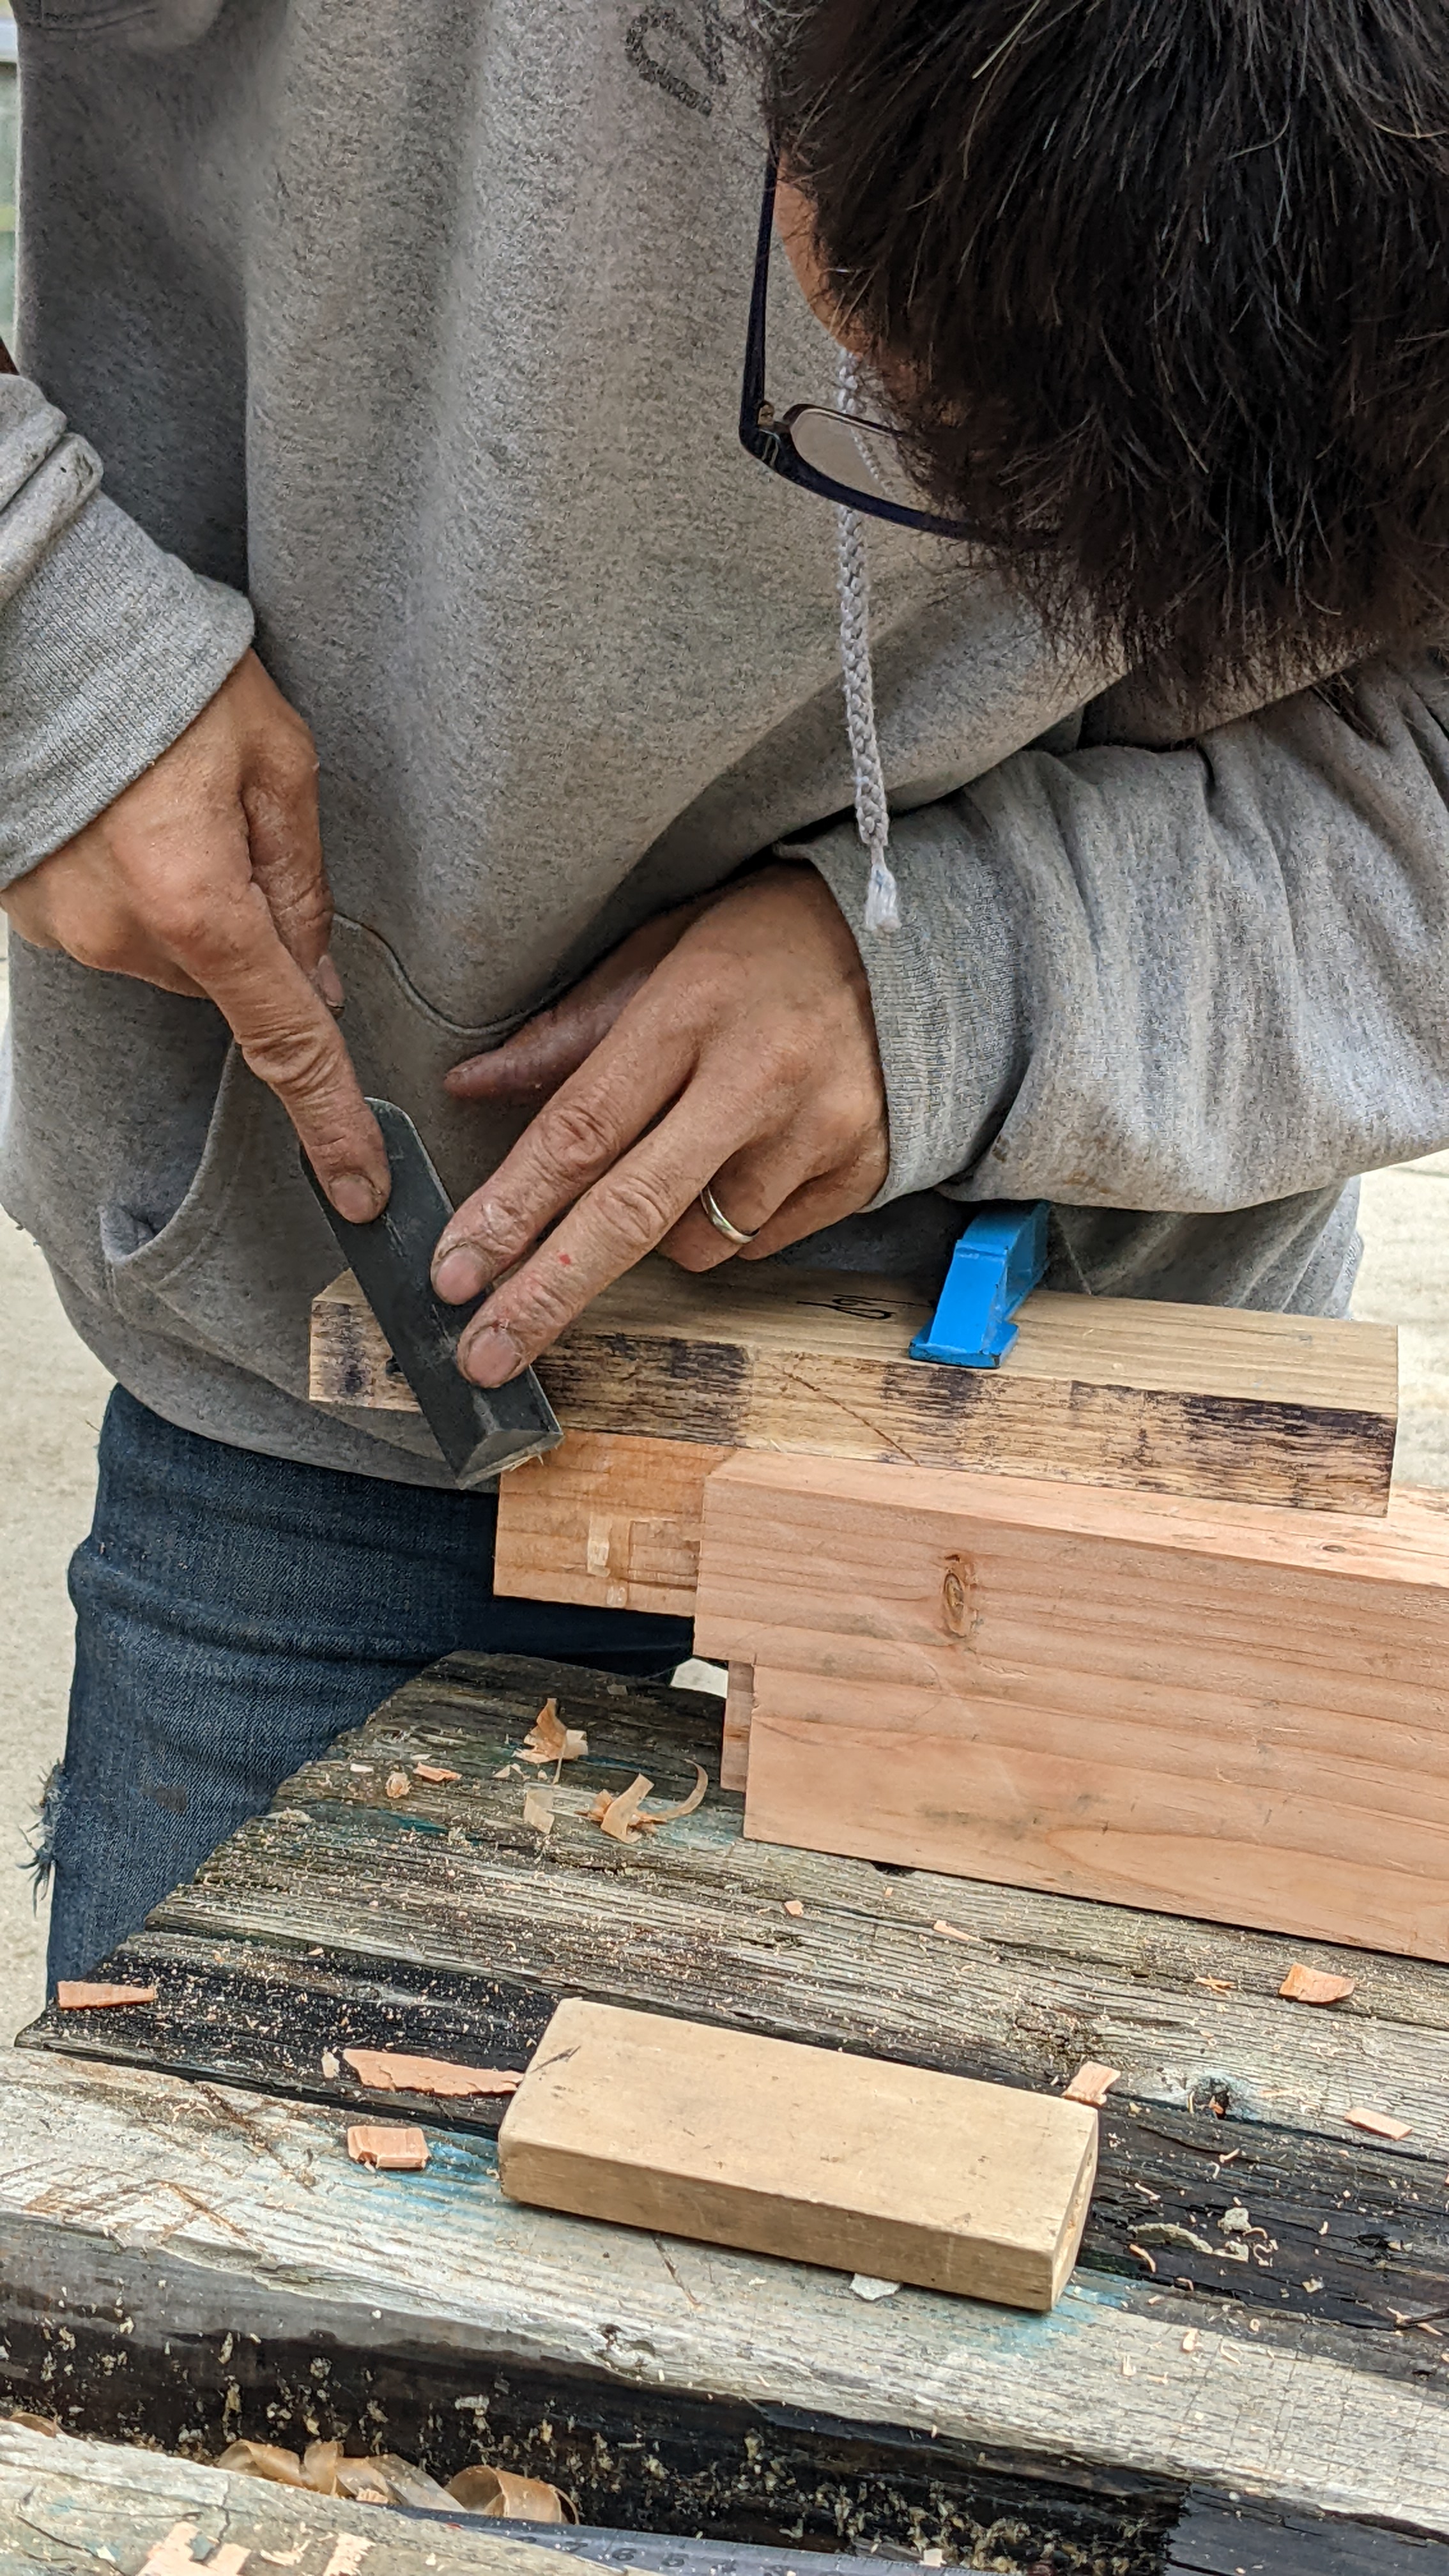
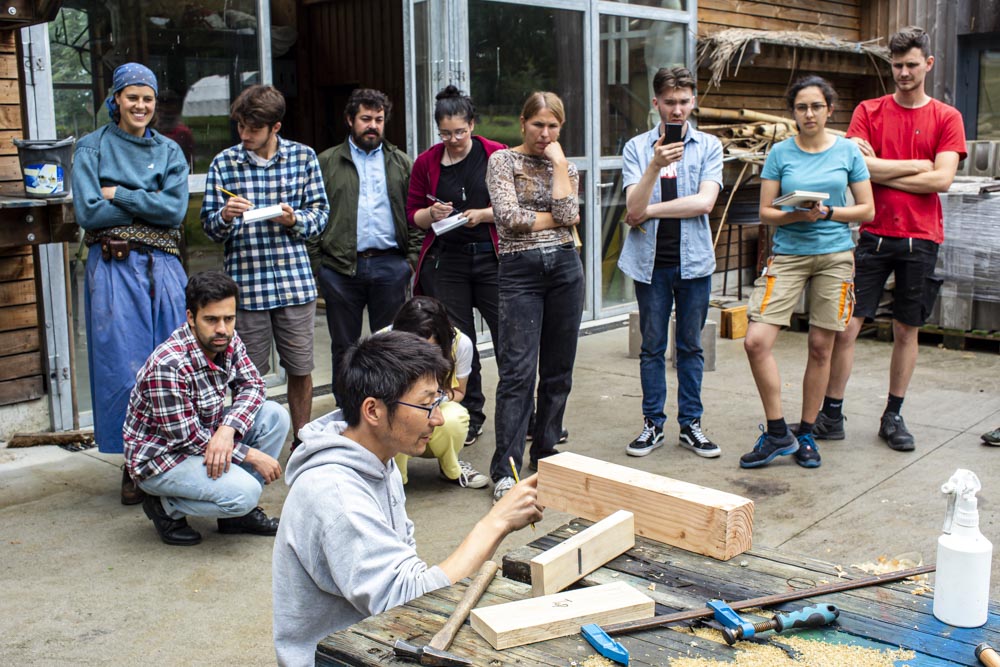
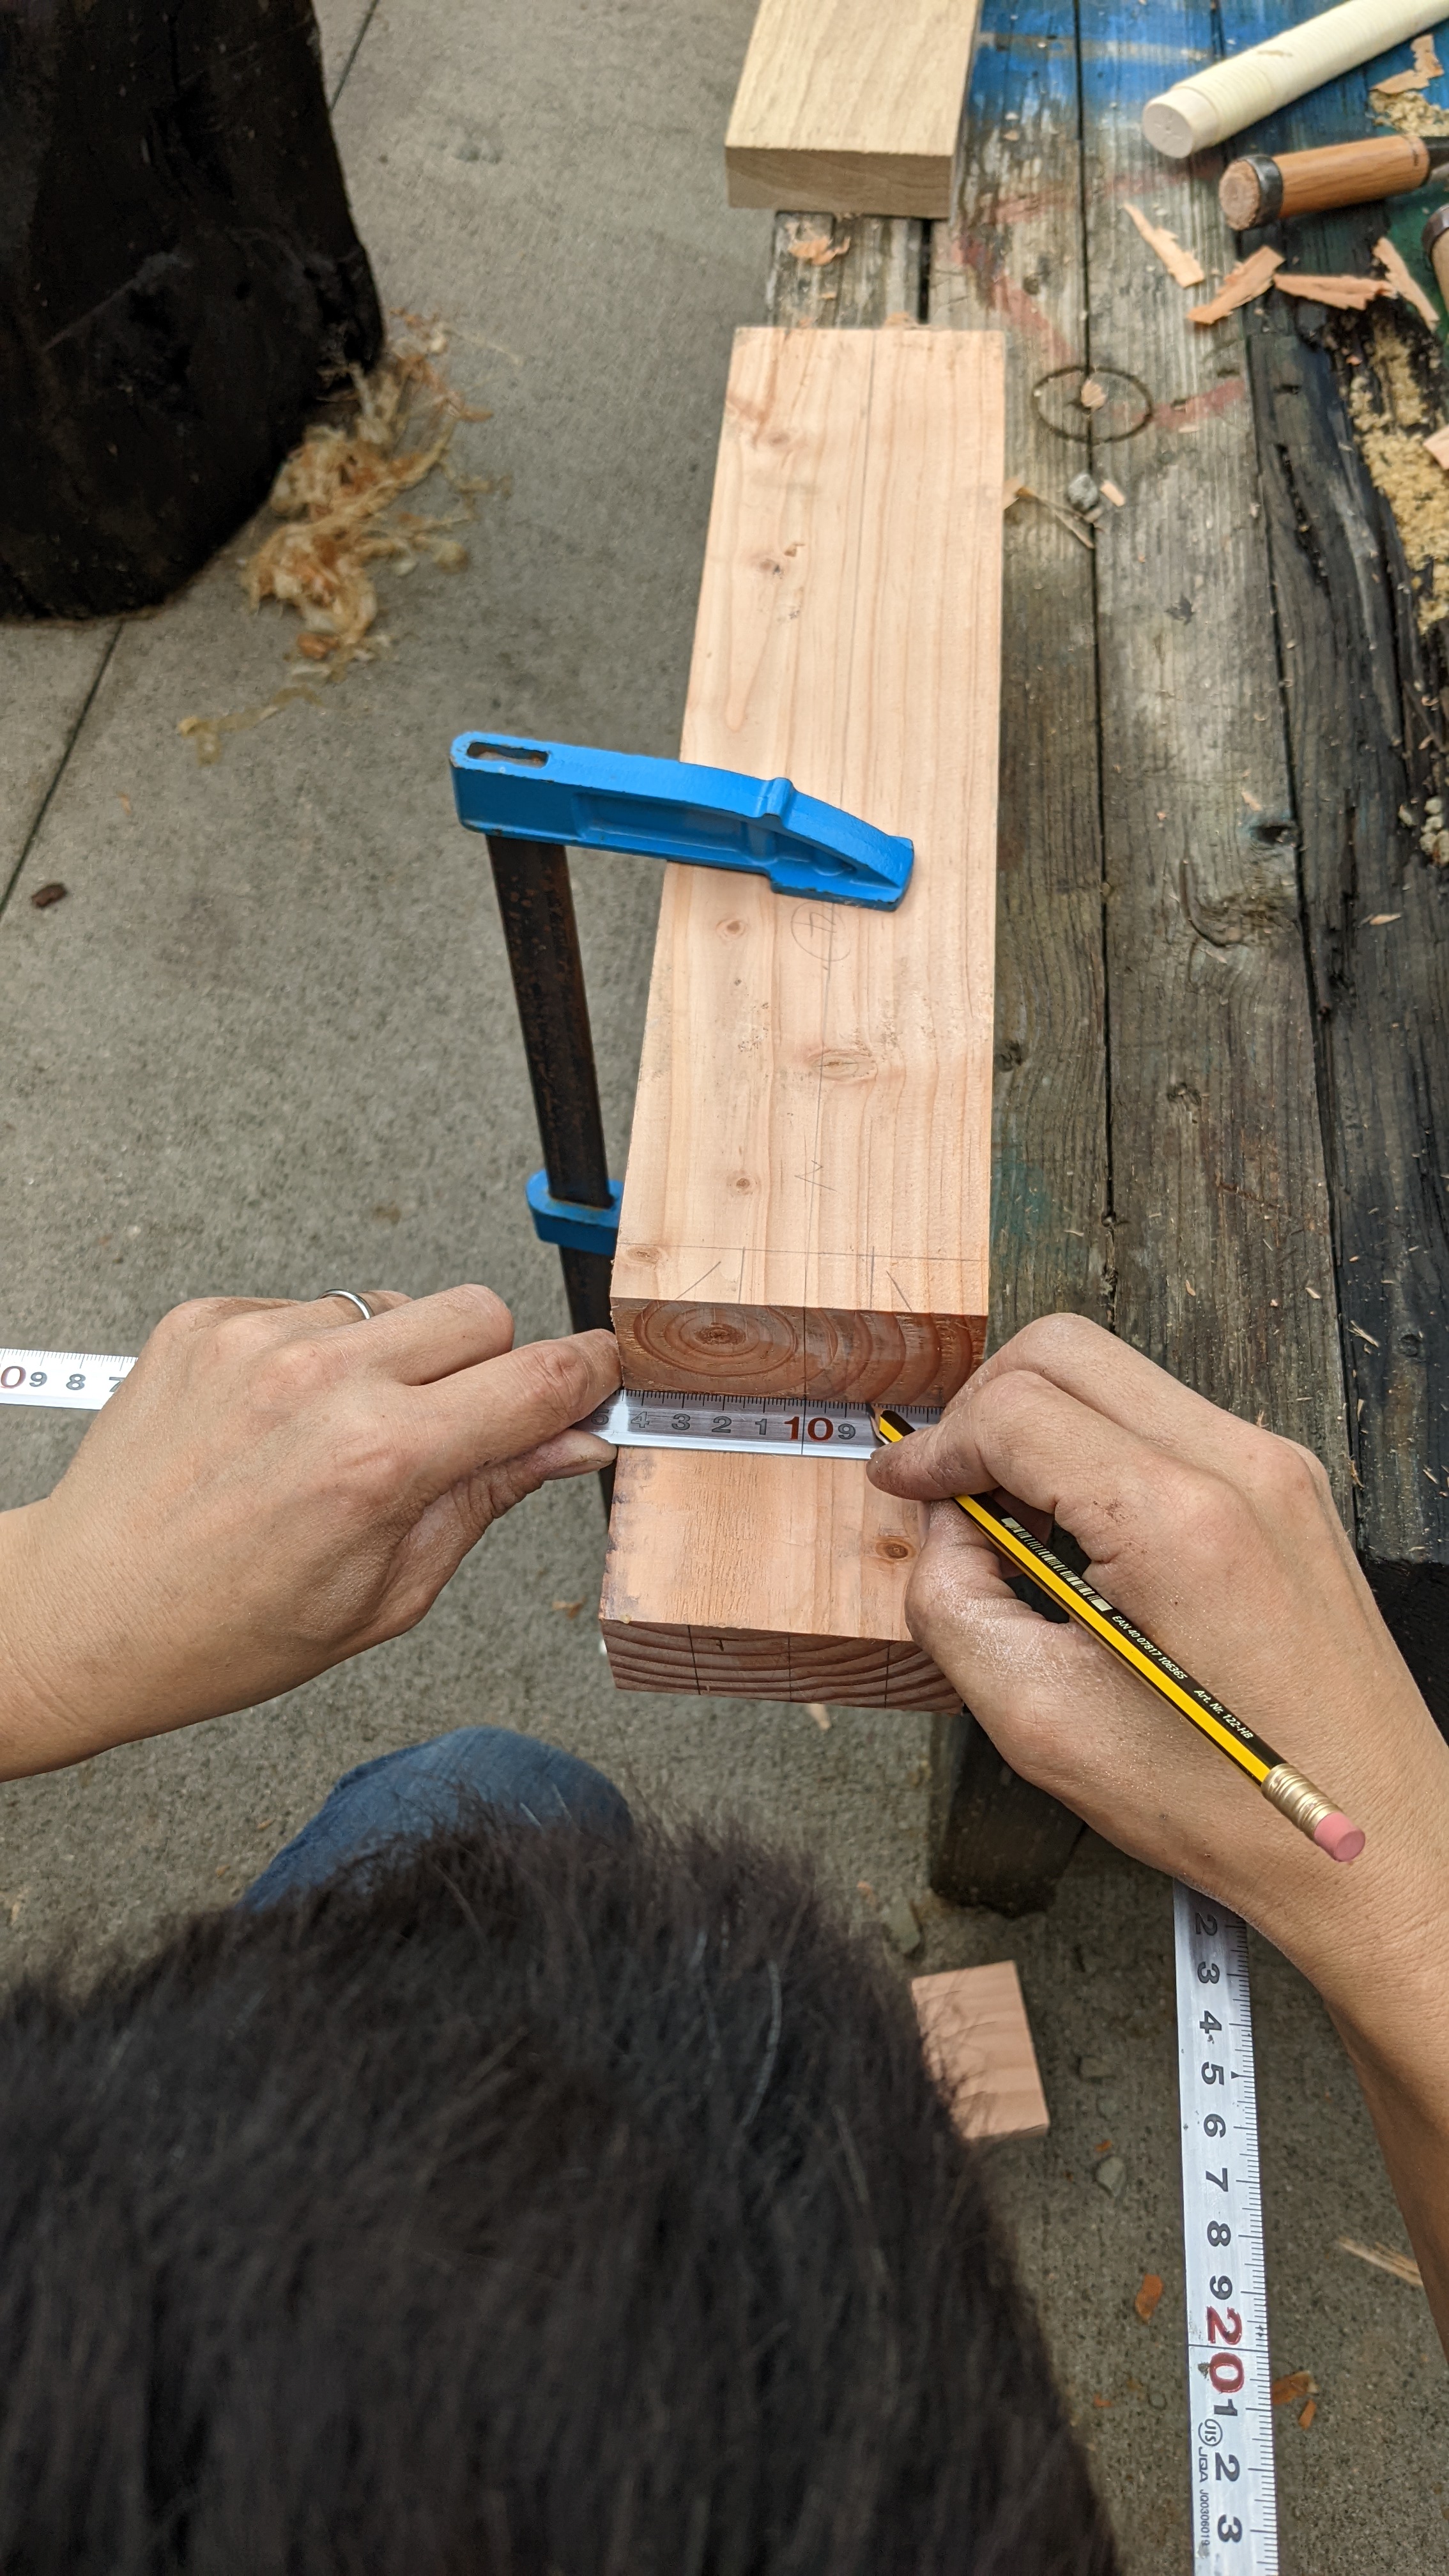
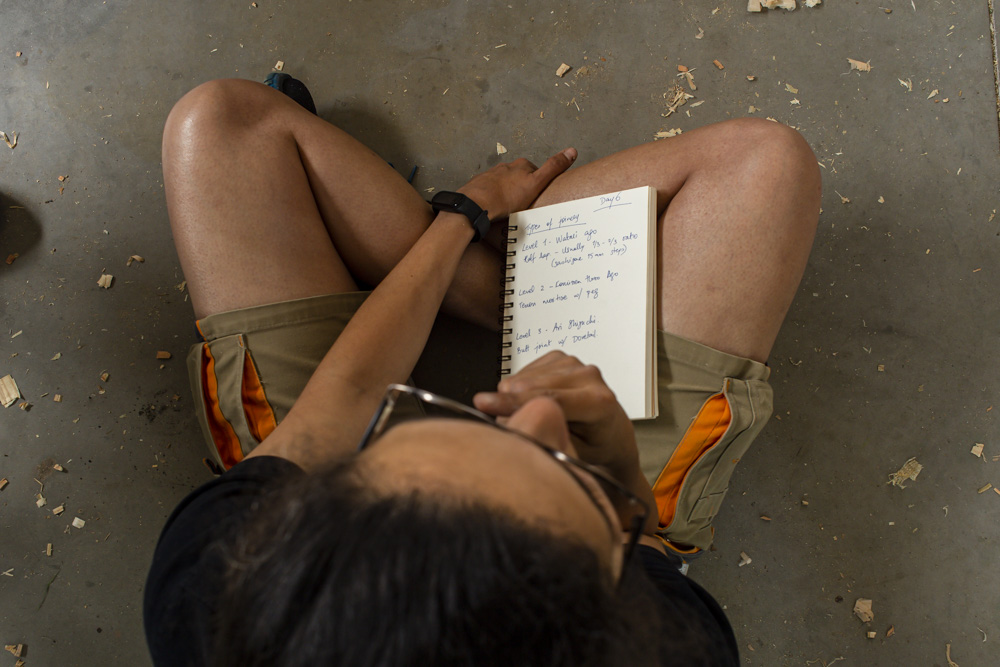
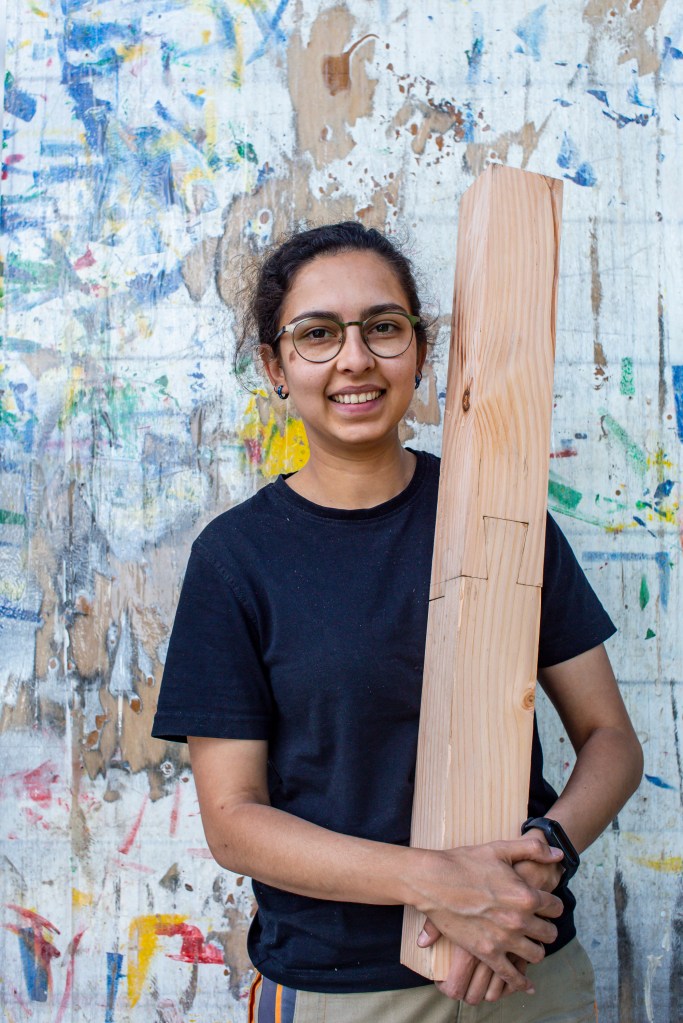
Using this knowledge, we then attempted to make our own joint. This helped us get used to the marking techniques and tools, but also a chance to work with the tools we had so lovingly sharpened the days before. We also took lots of notes, and documented the process to understand the theory behind the joint, but also for future reference.
The joint took about a day and a half to finish, and the last hour was spent adjusting and testing the joint to make sure the gaps closed and it fitted together perfectly. This involves a lot of observation and back and forth. It also takes some critical thinking and spatial imagination to understand exactly which part of the joint needs to be modified to achieve a certain result. It is a very important skill for a carpenter, and comes from years of experience and understanding every aspect of the joint at hand.
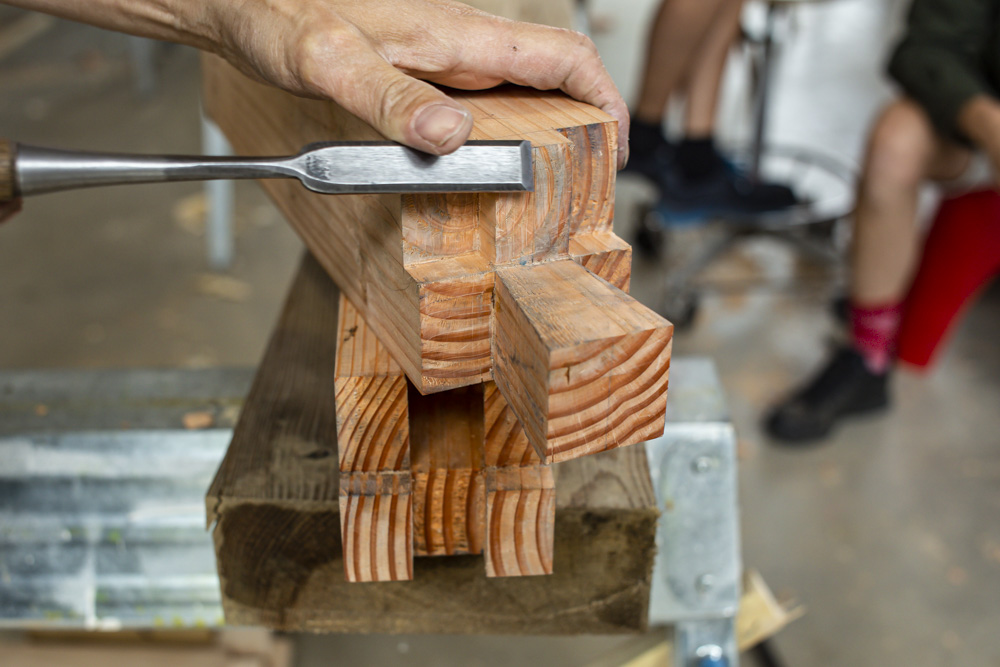

Once the joint sits together satisfactorily, any unevenness is planed down and smoothed with the help of the kanna. This step was very satisfying and the end result was extremely strong and, of course, great to look at. We were all very proud and happy that we managed to construct this complicated joint on our first try.

The entire experience was extremely enriching, and a wonderful insight into the practice of a traditional Japanese carpenter. So often the craft is romanticized and depicted as something it is not, and I am grateful that I now have an honest and first-hand experience of it.
Traditional Japanese carpentry is a lot about the ritual and the patience of handicraft, but also about knowledge passed down from generation to generation. It is complex, and techniques are deep rooted in soundness of structure, understanding of the material and a respect for it. The reverence and awe that is given to experienced Japanese craftspeople is extremely justified in my opinion.
Picture credits – Vanessa Hörig, Pietro Migliorati and Simon Searle

Japanese joinery has always fascinated me. As closed to magic as one can get. No nails and screws but a lot of spatial thinking and meticulous work.
Will attempt to build an artefact with this method on my next woodworking project.
Well written .
LikeLike
Thank you for your kind words, Rahul!
Yes it is indeed very versatile and fascinating to work in this manner. Precision is ofcourse paramount.
Wish you good luck with your next project!
LikeLike