
You might have seen my latest cabinet with tambour doors, here’s the process of designing and making it.
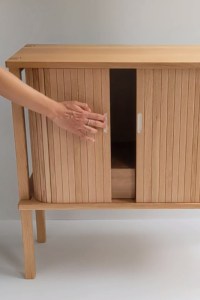
Tambour doors are a beautiful, tactile element to use in furniture design. Not only are they aesthetic, they are great for cabinets where the doors are open for long times and would be in the way. They are a perfect solution for tight spaces where there is no space for a door to swing open. They are elegant and an easy way to close a bow front cabinet. Depending on how the tambour door is designed and built, out of solid wood or veneered material, it can be used as a beautiful design element.
Designing a Tambour cabinet
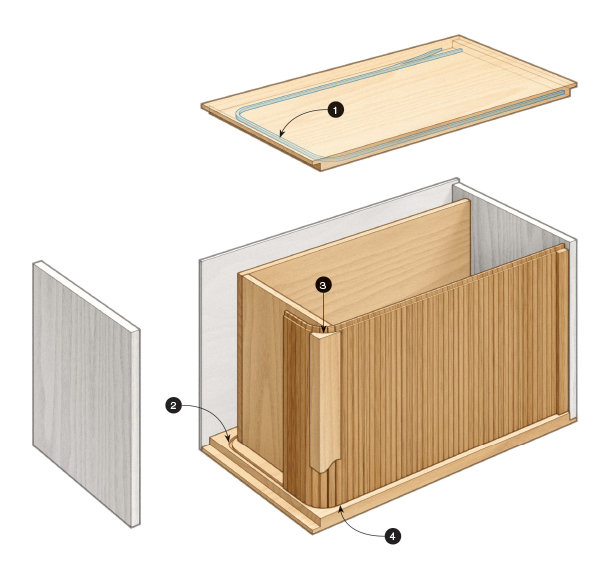
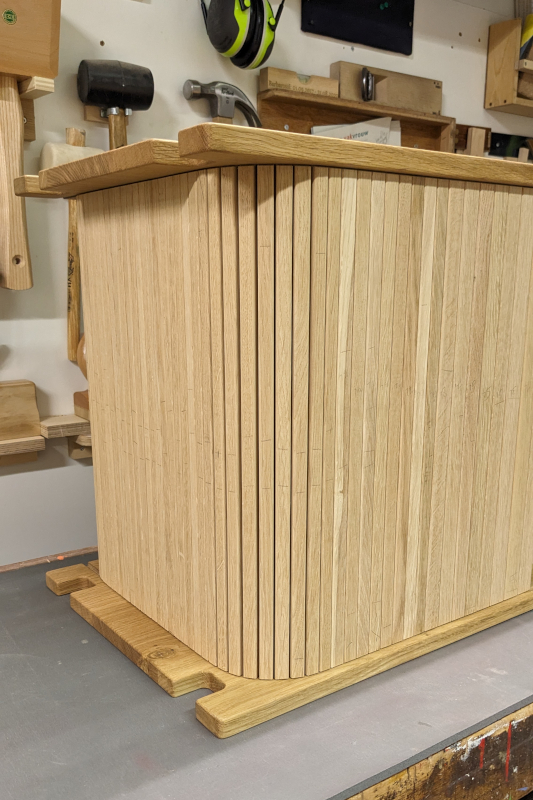
Understanding the anatomy of a cabinet with tambour doors is essential to designing a beautiful cabinet.
These kinds of cabinets have an extra side panel on the inside to prevent the contents from coming in contact with or blocking the door.
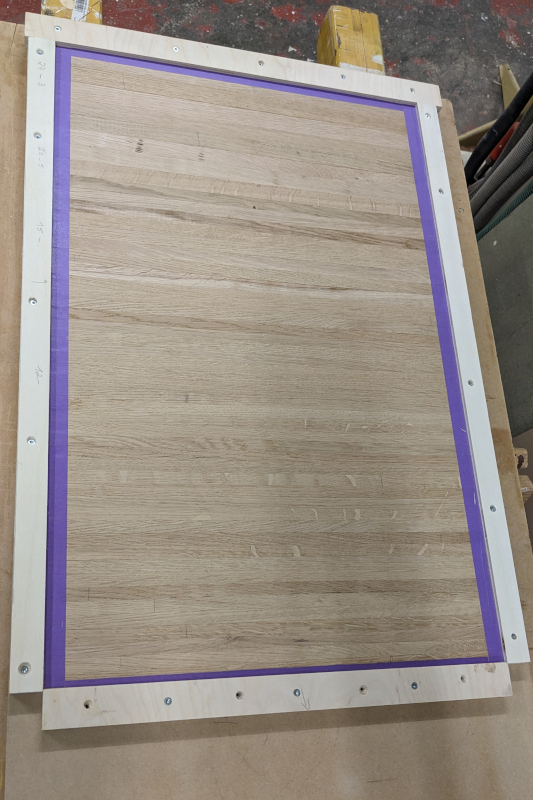
The lid and base will have the routed track (1) for the door to slide in, and the front corners often have a face frame (3) to cover the gap left by the door.
The cabinet can can have one or two back panels depending on whether its free standing or against a wall. The inner back panel that seals off the storage area is a must.
Keeping all these factors in mind, the cabinet can be designed.
Designing a Tambour door
There are many factors that need to be considered while designing a tambour door for your piece of furniture. These will have an effect on the aesthetics as well as the usability of the cabinet.
- What material is the door made of? Solid wood is a common option but using veneer meticulously adds the option of creating images that span the entire door.
- How thick and wide are the individual slats going to be? The thicker and wider the slats the bigger the radius of the track in which the doors will run. Narrower slats are more work and lumber, but look more elegant. A good width is around 15mm.
Thicker slats could make the door very heavy and difficult to use. If the slats are too thin the door could be too flimsy and rattle during usage. A good thickness is 12mm. - Will the front of the slats have a profile or are they going to be simple and flat? Make a couple of trial pieces so you can get an idea about the effect the profile will have on the overall look of the door.
- What kind of handle are you going to use to open and close the door. Remember the more difficult it is to open and close the doors, the stonger the handle needs to be. Dont make it too small and delicate.

Making a test piece

As with any moving part in a furniture project I would recommend doing a test for the tambour door with some scrap plywood.
Make sure to use the same thickness and width that you want to use in the final door. Attach the slats to each other from the back using tape, this holds the slats together like the canvas would hold the final door together.
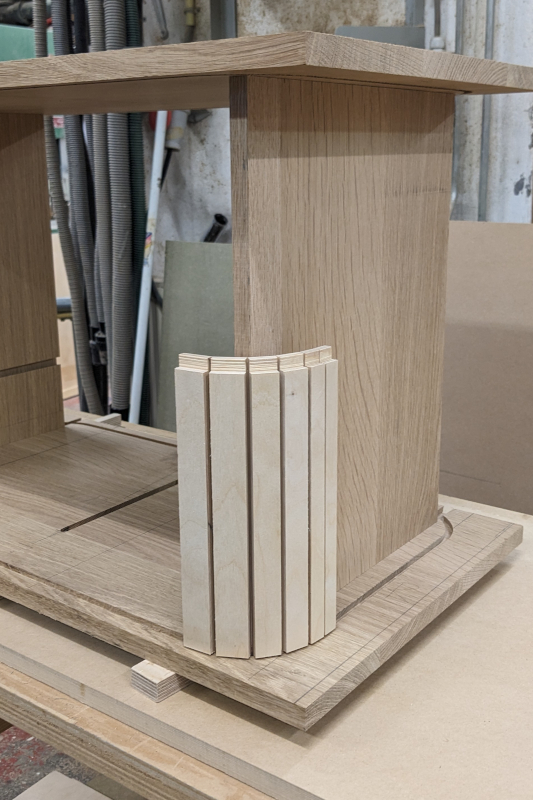
Rout a test track in a scrap piece of plywood to test the doors. The radius of this track depends on the thickness and width of your slats. For example, the door I built has slats of 24mm wide x 12mm (with rebate 6mm) thick and the track needed to have a minimum radius of 5cm. To reduce the thickness of the slats you can add a rebate to the front and back. This will also hide the track from view once the door is in.
Make sure the test door slides easily around the corner without getting stuck. If need be, increase the radius of the track (if your cabinet design allows it) or reduce the thickness of the slats. You need to find a balance between the two.
Routing the tambour track
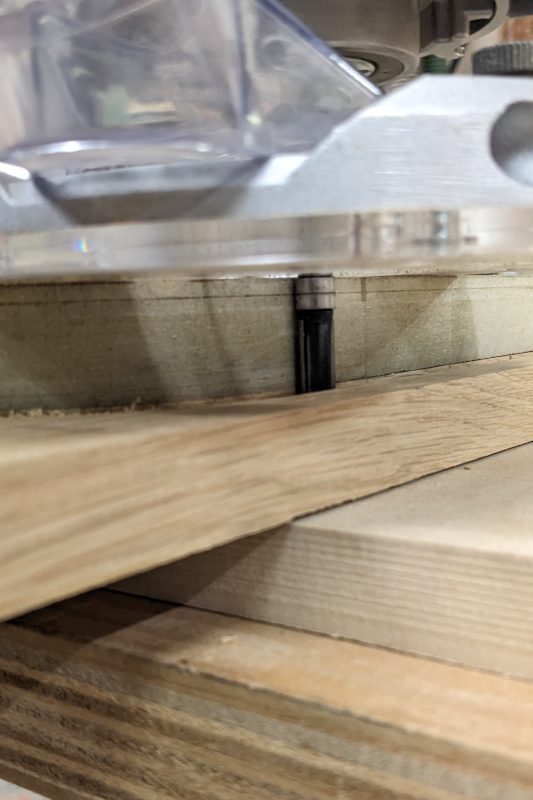
Once the thickness of the slats and the fitting radius for the track has been decided, a routing jig for the track can be made. The best material for this is a thick piece of MDF. I prefer to use a jig that is the size of the entire track so I can rout without having to reposition the jig, making it more precise.
By using a pattern routing bit with a copy ring on the top (see image 1) this track can be transferred to the cabinet lid and base. Correct positioning of the jig for routing and maintaining a consistent routing depth is crucial here. The track in both top and base have to coincide perfectly so that the door can slide easily once the cabinet is assembled. Make sure the cabinet is square while gluing it up.
Use the test door made from scrap plywood (4) to test the track again. It might interact differently in a different material. And at this stage it is still possible to make changes to dimensions of the individual slats.
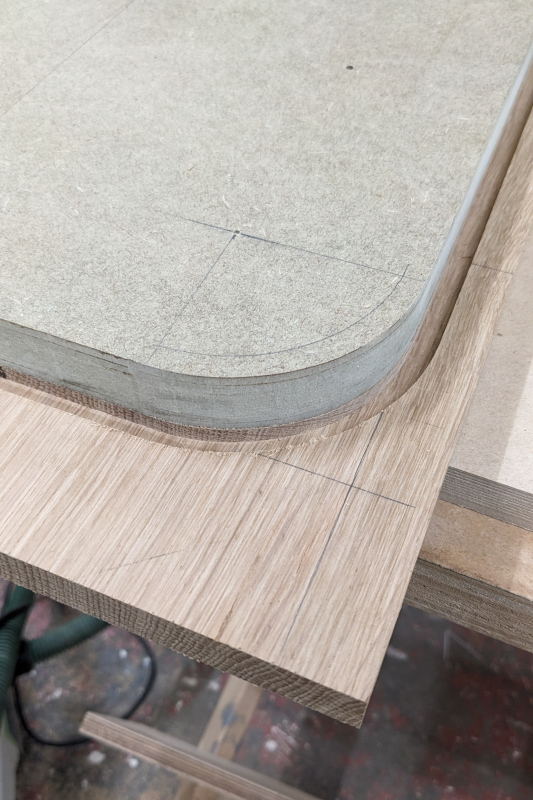
Don’t forget to rout an entrance/exit for the doors!

making the tambour door

Here’s an overview of how I made the tambour door.
- Once you have routed the track and assembled your cabinet, you can measure the exact length of each door. The number of slats you will need is the length divided by the width of your slats. I recommend making the door slightly longer and cutting it to length later.
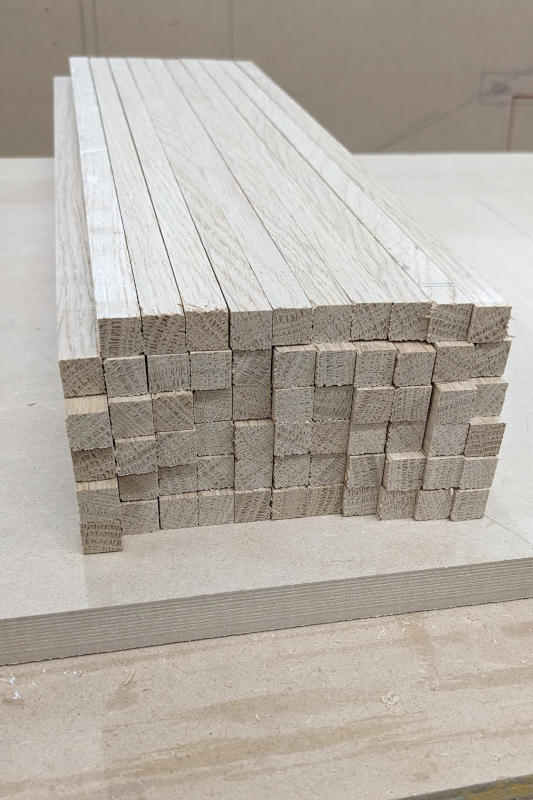
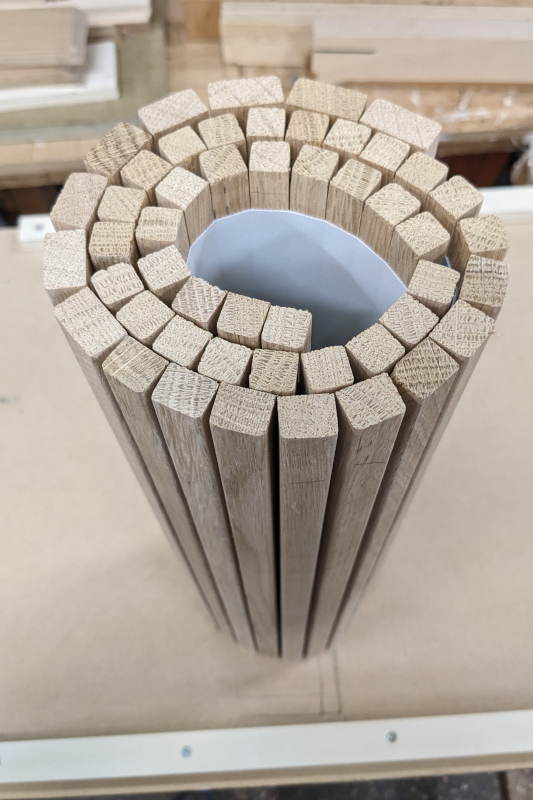
- Measure the final height for the doors. Make the individual slats for the door (1) in the desired width and thickness, leaving about 5cm extra in length. Make about 10% more slats than you need, because not all will be perfectly straight or some will have knots and other imperfections.
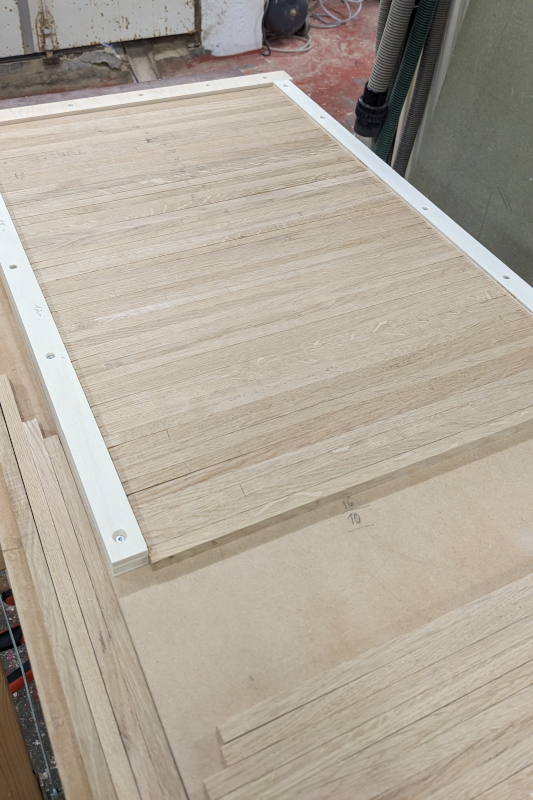
- Make a frame (2) for the slats to fit into by screwing pieces of plywood onto a base. The frame is the size of the door. Using this frame, sort and arrange the slats keeping in mind the final appearance of the door.
- Add a chamfer, roundover (3) or any other profile to each slat. Sand the profile and the sides of each slat and make them dustfree to prepare for glue up. Rearrange the slats back into the frame, this time face down.
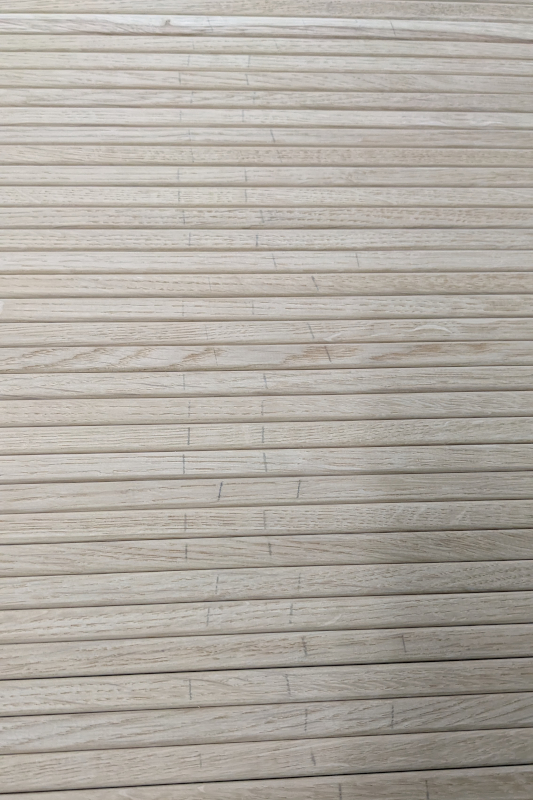
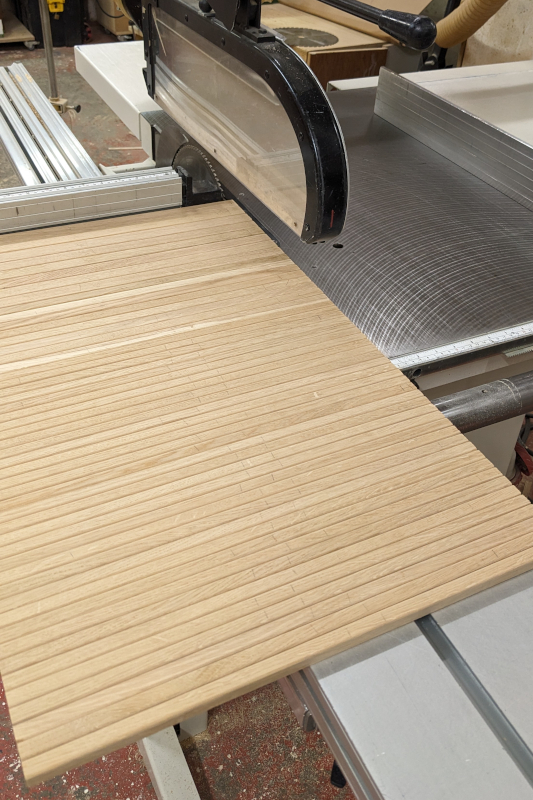
- Push the slats together with a clamp to close gaps, and add a plywood strip at the end to hold them in place. Using a hammer and a block make sure the slats are all lying flat and there is no unevenness. Now, using tape, mask off (4) the edges of the door, where you do not want the canvas to adhere to. This includes the area where the rebate will go later.
- Next the canvas is glued (5) onto the back. This process is similar to veneering. Spread glue (I used white PVAC glue) all over the back of the slats and attach the overlarge canvas to the back. Nice and flat, avoid gaps, creases and bubbles. You can apply pressure using a piece of MDF and a vacuum bag (I used clamps and cauls, worked perfectly fine) Once the glue is dry, cut the canvas cleanly off the unwanted area, the masking tape should help at this stage.
- I would recommend unclamping after an hour and cleaning squeeze out between the slats and letting it rest vertically (6) so the slats dont stick to each other.
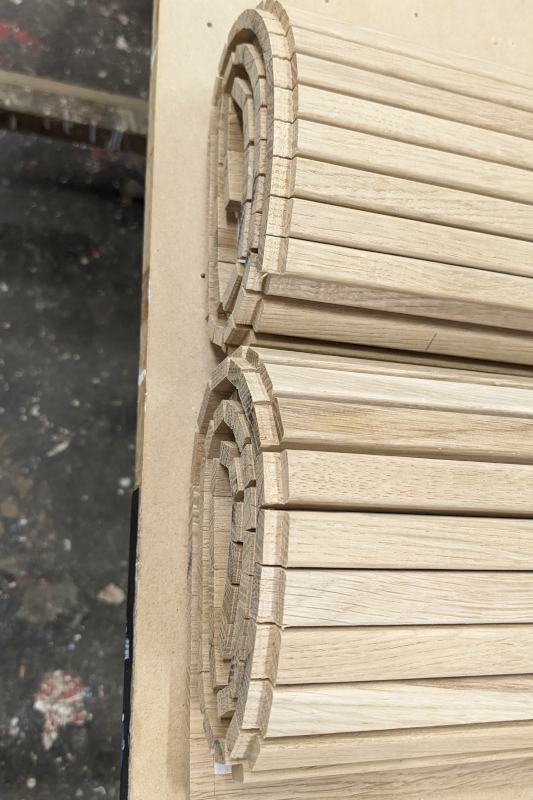
- Once the glue is dry, you can cut the door (7) to final width. Recheck the height needed from your cabinet and make it about 3mm shorter, you don’t need the door to scrape the top of the upper track. Make sure you cut it nice and parallel. Cut the door to length only once it is in the cabinet.
- Cut the rebates (8) for the door on the table saw or table router and test the door in your cabinet. Does it run smoothly? If not, try some of the following tips.
How to get the tambour door to run perfectly
Here are a couple of things that I did that helped me to get the doors to run super smooth. The aim is to be able to open and close the doors with just two fingers.
- Sand the track very well- the bottom ofcourse and even the sides. No fuzziness, no tear-out or unevenness that could block the slats from running smoothly.
- If you rebated the ends, made sure the door is running on the end of the slat and not on the rebate. There should be a 2-3mm reveal between the cabinet bottom and the end of the rebate.
- Use a shoulder plane to get rid of any uneveness left behind by the sawblade or router. Sand the rebates until smooth.
- Chamfer the ends of the slats. This decreases the surface area that is rubbing against the bottom of the track and will prevent the slats from catching anywhere in the track.
- Finish the dados as well as the inside of the track with whatever you are using on the rest of the cabinet; Hardwax oil, lacquer, etc. Make sure that it is a thin layer and there is no build up of finish anywhere.
- Lastly using simple candle wax or paraffin, coat the pins of the slats and the track lightly. A thin coat to act as a lubricant should do, prevent build up.
You will find many videos of the process and final product on my Instagram page. Please feel free to get in touch if you need any more tips or have any questions.
Leave a comment below if you found this post helpful and subscribe to my blog for more how-to’s.
Good luck!


